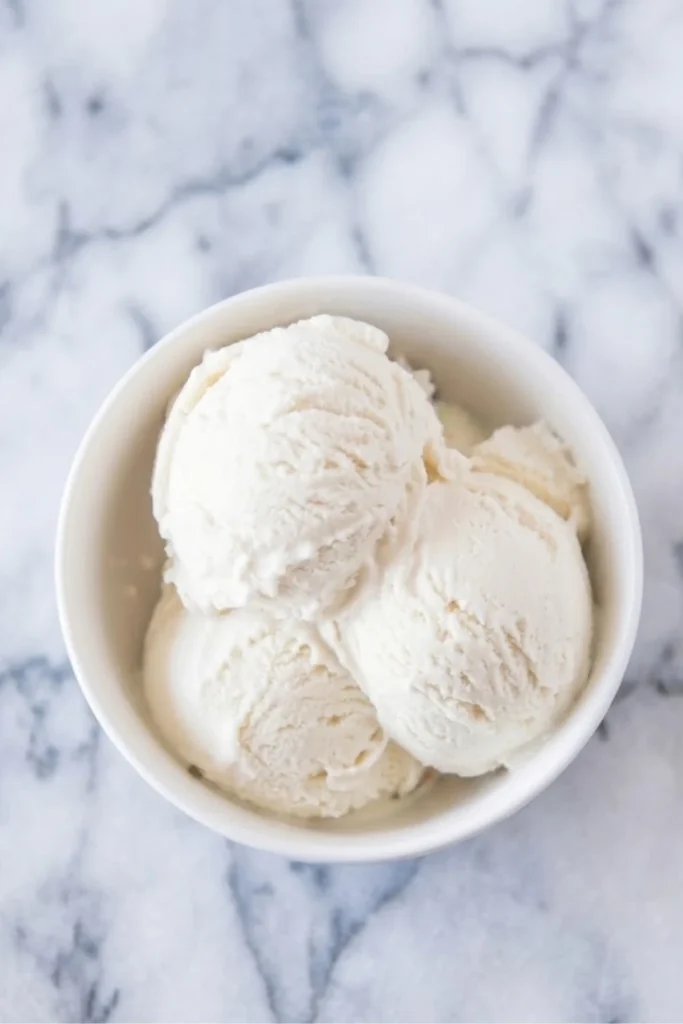
Ultimate Homemade Vanilla Ice Cream (Easy & Creamy Recipe)
There is absolutely nothing like the smell of fresh vanilla wafting through the kitchen! This homemade Vanilla Ice Cream is the ultimate crowd-pleaser, delivering a velvety smooth texture and a rich, nostalgic flavor that store-bought tubs just can’t match. Whether you’re topping a warm fruit cobbler or enjoying a big scoop in a waffle cone, this recipe creates the perfect sweet treat every single time.
I love how simple this recipe is to whip up with just a few pantry staples. It’s incredibly beginner-friendly, and the results are so professional that your friends will think you bought it from a gourmet creamery! This Vanilla Ice Cream provides a luscious, creamy base that pairs beautifully with any topping, making it a staple for summer parties or cozy nights in.
You’ll adore how the natural vanilla bean notes shine through in every bite. It’s the kind of recipe that makes memories, inviting everyone to gather around for a second scoop. Let’s get started on making your new favorite dessert!

More Ice Cream Recipes
- No-Churn Pumpkin Ice Cream Recipe
- Homemade Peach Pie Ice Cream (No-Churn!)
- Oatmeal Ice Cream with Toasted Walnuts Recipe
- Browned Butter Pecan Ice Cream
- No-Churn Chocolate Chip Ice Cream Recipe
- Honeycomb Ice Cream Recipe
INGREDIENTS
Gather these simple, high-quality ingredients to create your dreamy Vanilla Ice Cream. Using fresh dairy makes all the difference in achieving that signature creamy texture!
- 2 cups (480 ml) Heavy cream (also known as double cream)
- 1 cup (240 ml) Whole milk
- ¾ cup (150 g) Granulated white sugar
- 1 tablespoon (15 ml) Pure vanilla extract (or the seeds from 1 vanilla bean for extra gourmet flair!)
- Pinch of salt (to balance the sweetness)
INSTRUCTIONS
Follow these easy steps to churn out the smoothest Vanilla Ice Cream you’ve ever tasted. Since you’re working with your own setup, these steps ensure a perfect set!
- Whisk the Base: In a large mixing bowl, whisk together the 1 cup (240 ml) of whole milk, ¾ cup (150 g) of granulated sugar, and a pinch of salt until the sugar completely dissolves.
- Incorporate the Cream and Vanilla: Stir in the 2 cups (480 ml) of heavy cream and 1 tablespoon (15 ml) of pure vanilla extract. Mix gently until the liquid looks uniform and silky.
- Chill the Mixture: Cover the bowl with plastic wrap and refrigerate the base for at least 1–2 hours (or even overnight). A cold starting temperature ensures the creamiest Vanilla Ice Cream and prevents ice crystals from forming.
- Churn: Pour the chilled mixture into your ice cream maker. Follow the manufacturer’s instructions and churn until the mixture reaches a soft-serve consistency—this usually takes about 20–25 minutes.
- Freeze to Firm Up: Transfer the churned Vanilla Ice Cream into an airtight, freezer-safe container. Smooth the top with a spatula and freeze for at least 4 hours, or until it reaches your desired firmness.
Pro Tip: Press a piece of wax paper or parchment paper directly onto the surface of the ice cream before sealing the lid to prevent freezer burn!

TIPS & VARIATIONS
Want to take your Vanilla Ice Cream to the next level? These simple tweaks and expert tips ensure you get a perfect scoop every single time!
Expert Cooking Tips
- Chill Your Tools: If you can, chill the container you plan to store the ice cream in. This prevents the edges from melting the moment you transfer the freshly churned Vanilla Ice Cream from the machine.
- Don’t Skimp on Fat: Use full-fat whole milk and heavy cream. The fat content is what prevents a “grainy” or icy texture, giving you that luxurious mouthfeel.
- Vanilla Quality Matters: Since vanilla is the star, use a high-quality extract or vanilla bean paste. If you use a real vanilla bean, simmer it with the milk first to infuse the flavor, then cool completely before adding the cream.
Flavor Variations
- Vanilla Bean Specks: For a gourmet look, scrape the seeds of one vanilla bean into the mixture. Those little black specks look beautiful on a cone!
- Mix-ins: Fold in crushed cookies, chocolate chips, or a swirl of salted caramel during the last 5 minutes of churning.
- Dairy-Free Option: Swap the dairy for full-fat canned coconut milk and cashew cream for a vegan version of this Vanilla Ice Cream.
Storage & Make-Ahead
- Freezing: This ice cream stays fresh in the freezer for up to 2 weeks. After that, it may start to lose its creamy texture.
- Softening: Homemade ice cream freezes harder than commercial brands. Let the container sit on the counter for 5–10 minutes before scooping for the perfect consistency.
SERVING IDEAS
Now comes the best part—eating it! This Vanilla Ice Cream is the ultimate versatile dessert. Here are a few ways to serve it up and make it look as good as it tastes:
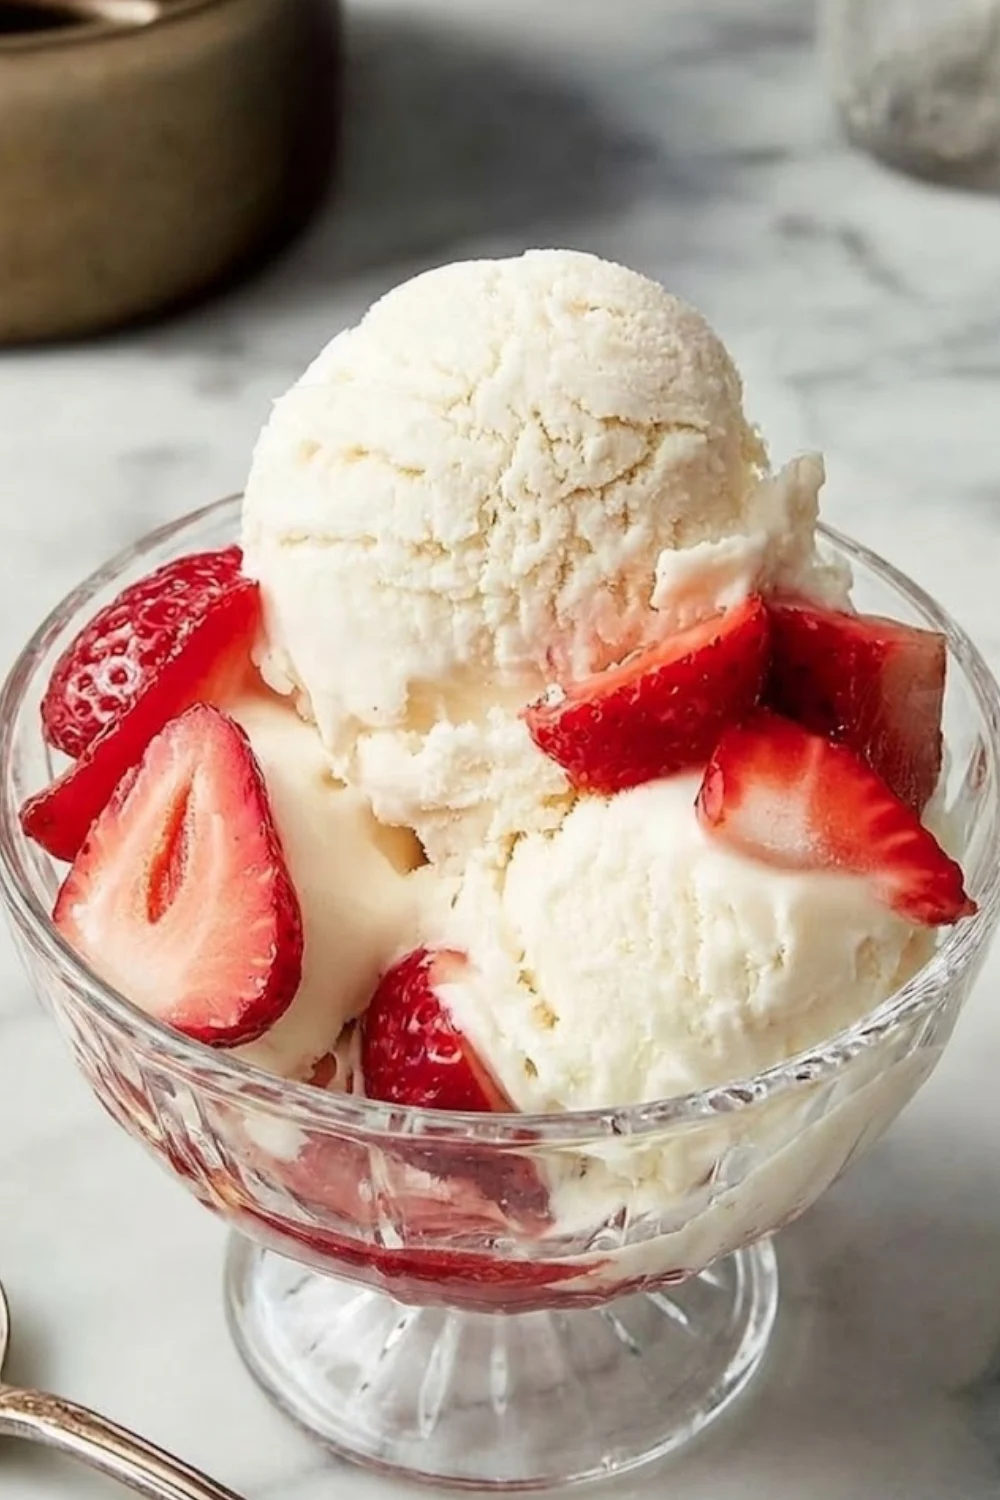
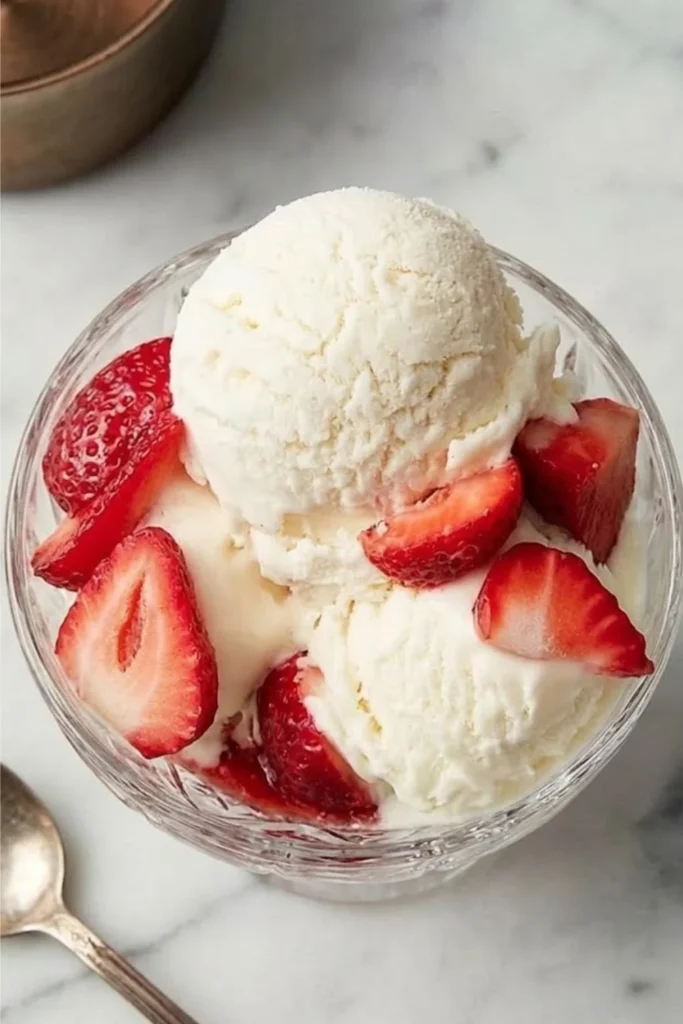
- The Classic Sundae: Scoop a generous amount of Vanilla Ice Cream into a chilled glass bowl. Drizzle with warm chocolate ganache or salted caramel sauce, then top with a maraschino cherry and a sprinkle of toasted nuts.
- Warm Dessert Topper: Serve a cold scoop right on top of a slice of warm apple pie, a fudgy brownie, or a peach cobbler. The way the ice cream melts into the warm pastry is pure magic!
- Affogato Style: For a sophisticated adult treat, place a small scoop of Vanilla Ice Cream in a coffee cup and pour a hot shot of espresso right over it.
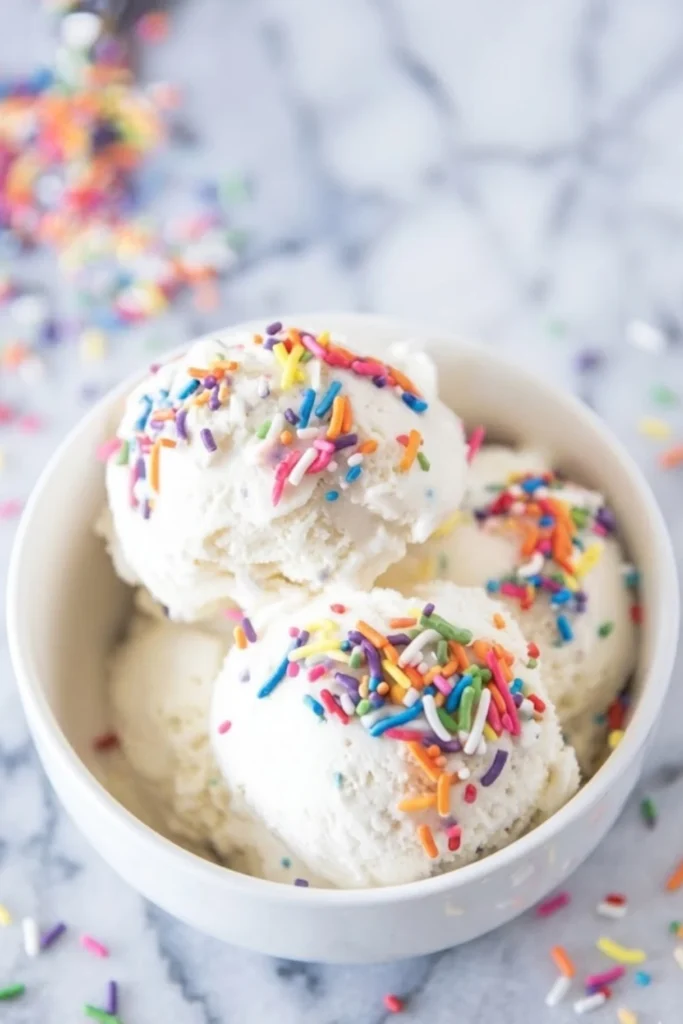
- Party Favorite: Set up an “Ice Cream Bar” for birthdays or holidays! Place your homemade Vanilla Ice Cream in the center and surround it with bowls of fresh berries, sprinkles, crushed pretzels, and whipped cream.
- The Ultimate Sandwich: Press a scoop of Vanilla Ice Cream between two soft chocolate chip cookies for a homemade ice cream sandwich that kids (and adults!) will obsess over.
FAQs
You’ve got questions, and I’ve got the answers! Here are the most common things people ask when making this luscious Vanilla Ice Cream at home.
- How long can I store homemade Vanilla Ice Cream? You can keep this treat in an airtight container for up to 2 weeks. For the best texture, try to enjoy it within the first week before those pesky ice crystals start to form.
- Can I make this recipe without an ice cream maker? Yes! To make “no-churn” Vanilla Ice Cream, whip the heavy cream to stiff peaks, then gently fold in the milk, sugar, and vanilla. Freeze the mixture, stirring every 30 minutes for the first 3 hours to break up ice crystals.
- Why is my ice cream coming out too hard? Homemade ice cream lacks the stabilizers found in store-bought versions. To fix this, add a tablespoon of vodka or vegetable glycerin to the mix; it lowers the freezing point and keeps the Vanilla Ice Cream scoopable!
- Can I substitute the sugar for a natural sweetener? You sure can! Honey or maple syrup work beautifully, though they will slightly change the flavor profile. Keep in mind that liquid sweeteners may result in a slightly softer set.
- How do I prevent ice crystals from forming on top? Always press a piece of plastic wrap or parchment paper directly onto the surface of the Vanilla Ice Cream before putting the lid on. This blocks out the air that causes freezer burn.
- What is the best way to get a perfect scoop? Dip your ice cream scoop in a glass of warm water before each scoop. It glides through the frozen Vanilla Ice Cream like butter!
Recipe
Creamy Vanilla Ice Cream

This is the only Vanilla Ice Cream recipe you’ll ever need! It’s rich, velvety, and features a clean, classic vanilla flavor that pairs perfectly with every dessert imaginable.
Ingredients
- 1 cup (240 ml) Whole milk
- ¾ cup (150 g) Granulated white sugar
- Pinch of salt
- 2 cups (480 ml) Heavy cream
- 1 tablespoon (15 ml) Pure vanilla extract
Instructions
- Mix the Base: In a medium bowl, whisk the whole milk, sugar, and salt together until the sugar granules have completely dissolved.
- Combine: Stir in the heavy cream and vanilla extract until well combined.
- Chill: Cover and refrigerate the mixture for at least 2 hours. For the best results and the creamiest Vanilla Ice Cream, chill it until it is cold to the touch.
- Churn: Pour the cold mixture into your ice cream maker bowl. Churn according to the manufacturer's directions (usually 20–25 minutes) until it reaches a soft-serve consistency.
- Hard Freeze: Transfer the churned Vanilla Ice Cream to an airtight container. Freeze for at least 4 hours to allow it to firm up for perfect scooping.
Notes
Nutrition Information:
Yield: 8 Serving Size: 1/2 cupAmount Per Serving: Calories: 285Total Fat: 22gCarbohydrates: 21gProtein: 2g
Nutrition information is estimated and may vary based on ingredients used.
I truly hope you enjoy making (and eating!) this creamy Vanilla Ice Cream as much as I do! There’s something so rewarding about creating a high-quality dessert from scratch right in your own kitchen. It is so much better than anything you can find in the freezer aisle, and I just know your family is going to beg for a second scoop.
If you try this recipe, please let me know how it turned out for you! I love hearing about your kitchen adventures and seeing your beautiful creations. Don’t forget to save this recipe to your Favorite Desserts board on Pinterest so you always have it handy when those sweet cravings hit. Happy churning, and enjoy every single velvety bite of your homemade Vanilla Ice Cream!