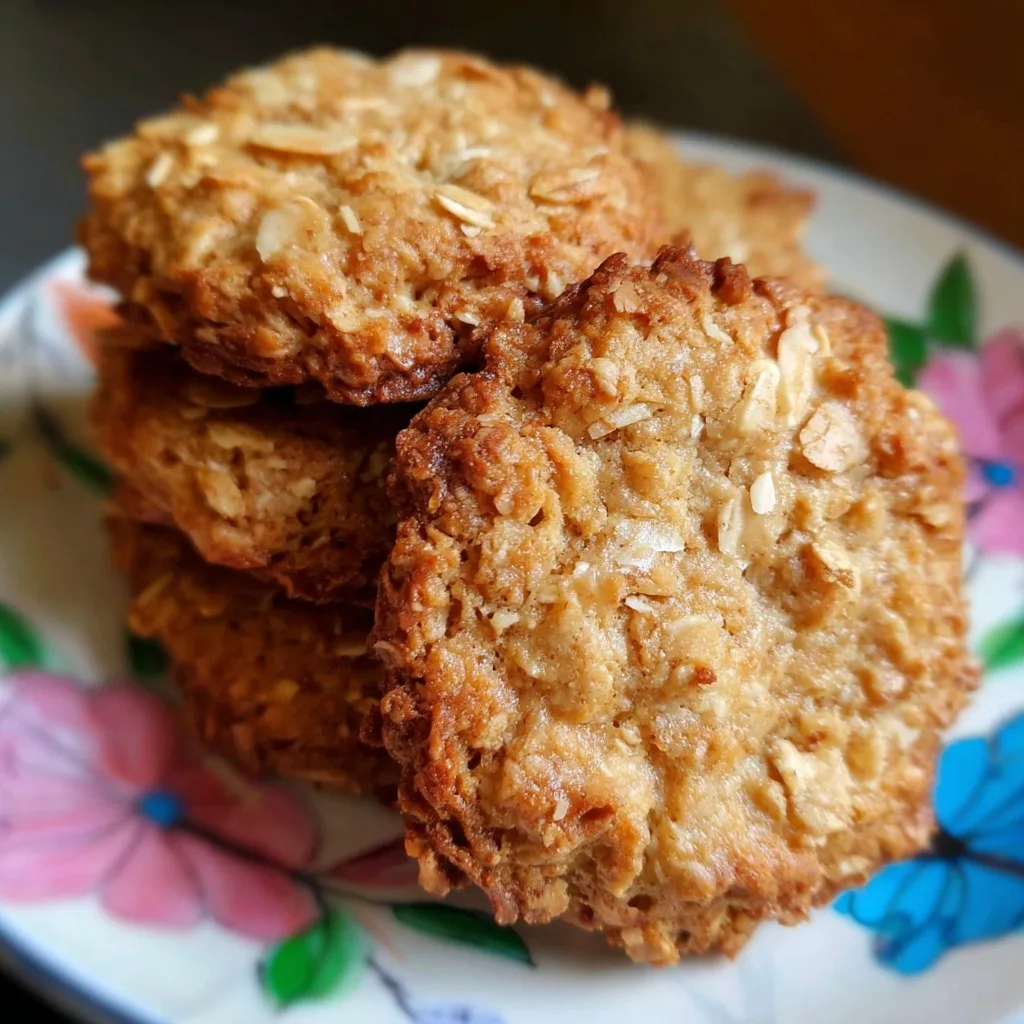
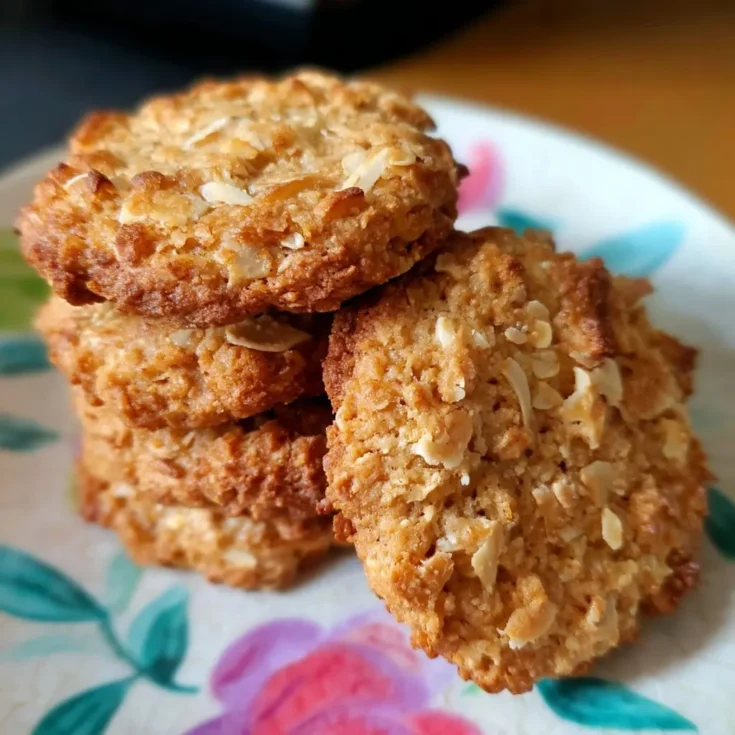
Anzac Biscuits (Chewy or Crispy — Your Way!)
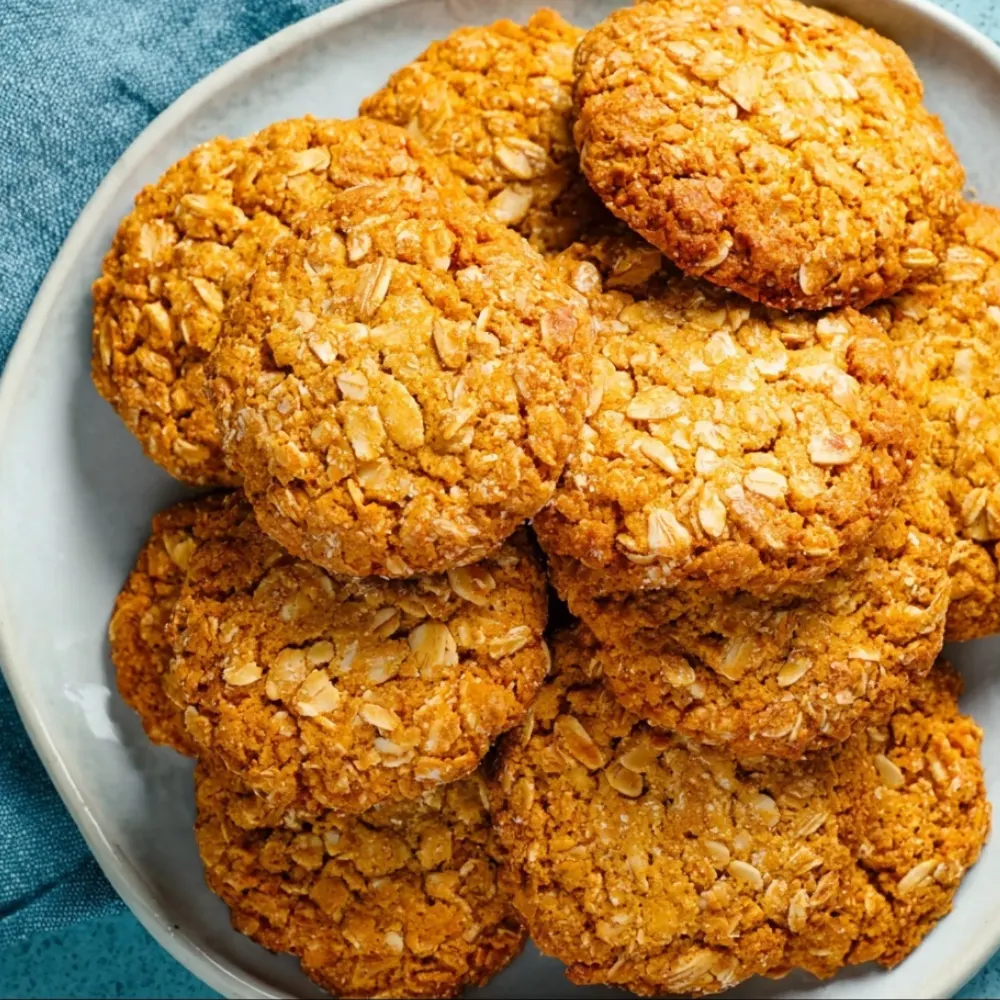
Anzac biscuit memories run deep. There’s something truly nostalgic about the smell of them baking in the oven. I still remember standing on tiptoes beside my nan, sneaking little bits of golden syrup from the spoon while she stirred the oats and coconut with care. These biscuits aren’t just a treat — they’re part of our history, a humble recipe that has lived on through generations in both Australia and New Zealand.
This recipe is the one I reach for every single Anzac Day — and honestly, many times in between. Whether you love them chewy and soft or prefer them with a golden, crisp edge, I’ll show you exactly how to get them just right.
We’ll walk through the story behind Anzac biscuits, the key ingredients (with a few handy swaps), and step-by-step instructions that are perfect for beginners and seasoned bakers alike. I’ll also share a few fun twists — including gluten-free and vegan options — so everyone can enjoy them.
So, if you’ve ever wondered how to make a proper Anzac biscuit that’s simple, delicious, and full of meaning, you’re in the right place. Let’s get baking!
What Are Anzac Biscuits, Really?
Anzac biscuits are more than just a sweet snack — they’re a beautiful little slice of history. The name “ANZAC” comes from the Australian and New Zealand Army Corps, and these biscuits were originally made by loved ones at home during World War I. Because they had no eggs and could last a long time, they were ideal for shipping across the seas to soldiers serving far from home.
What I love most about Anzac biscuits is that every family seems to have their own version. Some like them thick and chewy, others thin and crisp. But no matter how you make them, the warm, toasty mix of oats, coconut, golden syrup, and butter always brings that familiar, comforting flavor we all grew up with.
They’re traditionally baked around Anzac Day on April 25th, but honestly, I make them year-round — especially when I need something quick, satisfying, and crowd-pleasing.
So whether you’re new to baking or just looking to perfect your version, you’ll find this Anzac biscuit recipe both meaningful and foolproof.

Equipment You’ll Need
You don’t need anything fancy to make Anzac biscuits — just a few kitchen basics. Here’s what I always use:
- Large mixing bowl – for combining your dry ingredients
- Small saucepan – to melt butter and golden syrup
- Wooden spoon or silicone spatula – to mix everything together
- Measuring cups and spoons – metric or US, either works
- Baking tray – lined with baking paper
- Cookie scoop or tablespoon – helps keep the biscuits even in size
- Cooling rack – to cool them properly without going soggy
Optional but handy:
- Digital kitchen scale – for more accuracy
- Cookie cutter ring – if you want perfectly round edges
- Air-tight tin or jar – for storage
Ingredients You’ll Need (and My Go-To Substitutions)
These pantry-friendly ingredients are what make Anzac biscuits so simple and satisfying. You probably have most of them on hand already! I’ve also included a few substitutions I’ve tried over the years — just in case you’re missing something or want to tweak the recipe.
Classic Ingredients:
- 1 cup (90g) rolled oats – I use traditional rolled oats for that chewy bite
- 1 cup (150g) plain flour – all-purpose flour works perfectly here
- 1 cup (85g) desiccated coconut – unsweetened for best flavor
- 3/4 cup (150g) brown sugar – light brown sugar gives a subtle molasses note and adds depth, but you can use white sugar if needed — just note it’ll be slightly sweeter and less rich in flavour
- 125g (1/2 cup) unsalted butter – melted gently with syrup
- 2 tablespoons (40g) golden syrup – essential for that iconic taste
- 1/2 teaspoon baking soda – helps the biscuits spread and crisp up
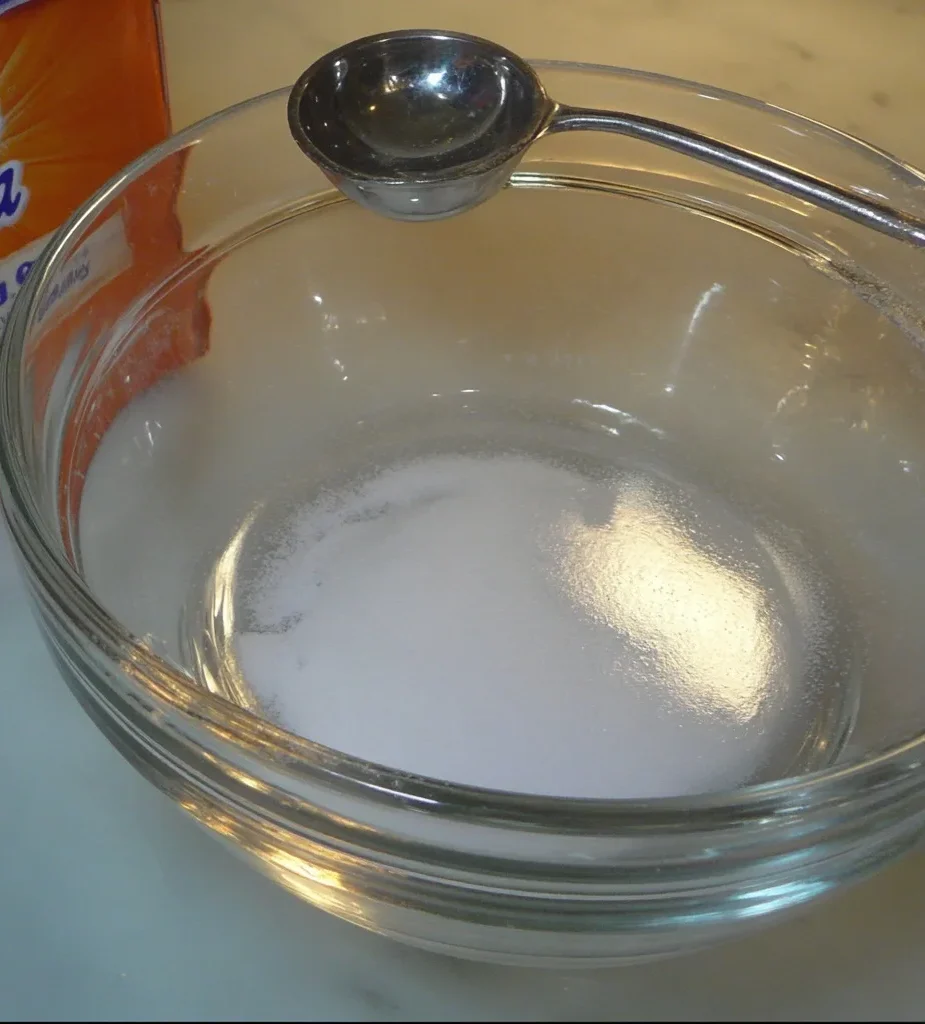
- 2 tablespoons boiling water – activates the baking soda
My Favourite Swaps (Tested and Approved):
- No golden syrup? Try honey or maple syrup — the flavor will be slightly different, but still delicious
- Need it gluten-free? Use GF plain flour and certified gluten-free oats
- No coconut? Just add an extra 1/3 cup of oats or try almond meal
- Want to make it vegan? Swap butter for coconut oil (refined for neutral flavor)
| Ingredient | Quantity (Metric) | Quantity (US Cups) | Substitution Tips |
|---|---|---|---|
| Rolled Oats | 90g | 1 cup | Use GF oats if needed |
| Plain Flour | 150g | 1 cup | Use GF plain flour |
| Coconut (des.) | 85g | 1 cup | Swap for almond meal or extra oats |
| Brown Sugar | 150g | 3/4 cup | Use white sugar if needed |
| Unsalted Butter | 125g | 1/2 cup | Use coconut oil for vegan |
| Golden Syrup | 40g | 2 tbsp | Try honey or maple syrup |
| Baking Soda | — | 1/2 tsp | No subs — it’s essential |
| Boiling Water | — | 2 tbsp | Activates the soda |
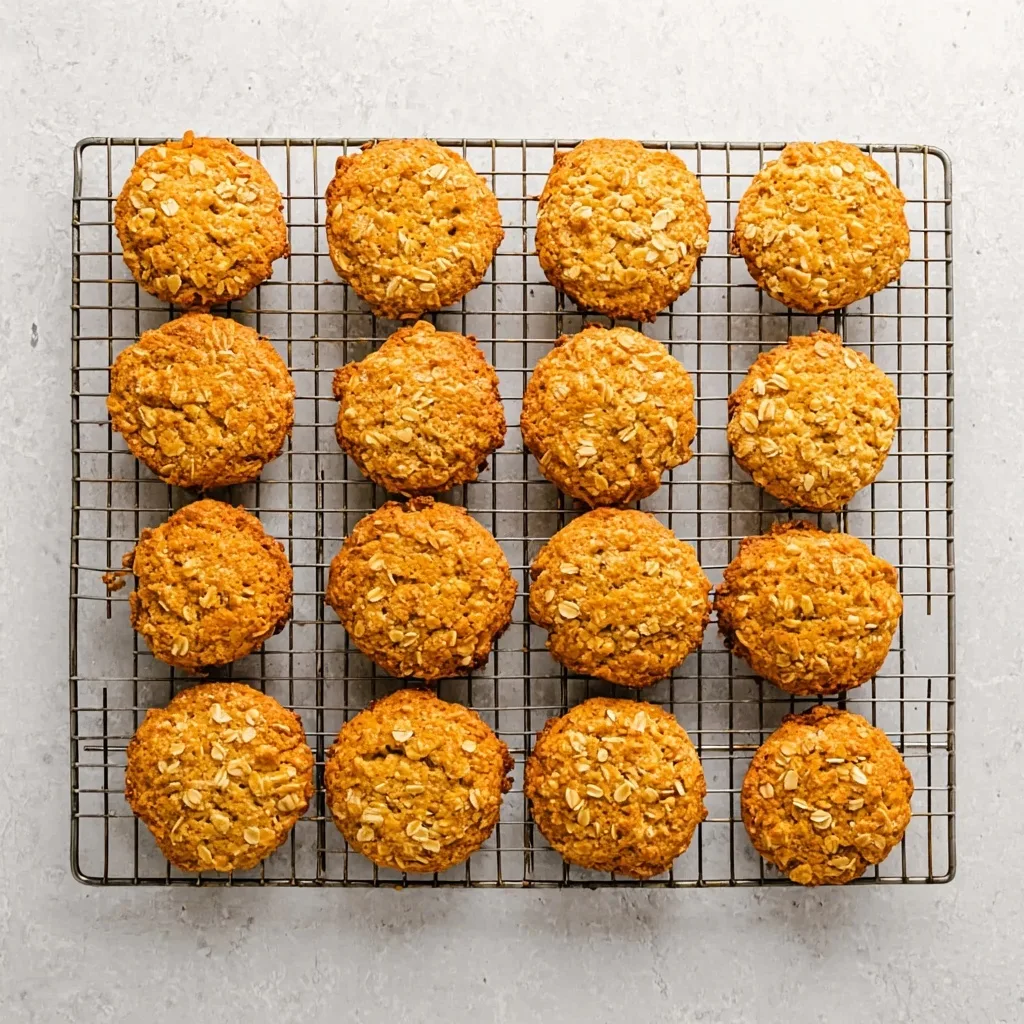
How to Make Anzac Biscuits Step-by-Step
My Foolproof Method for Chewy or Crispy Every Time
This is the exact method I’ve used for years — it’s simple, reliable, and gives you that golden smell filling your kitchen in no time. Whether you like them chewy or crisp, you’ll find your perfect texture here.
Step 1: Preheat and Prep
Preheat your oven to 160°C (320°F) fan-forced. Line a baking tray with baking paper. I usually prepare two trays so I can bake them in batches.
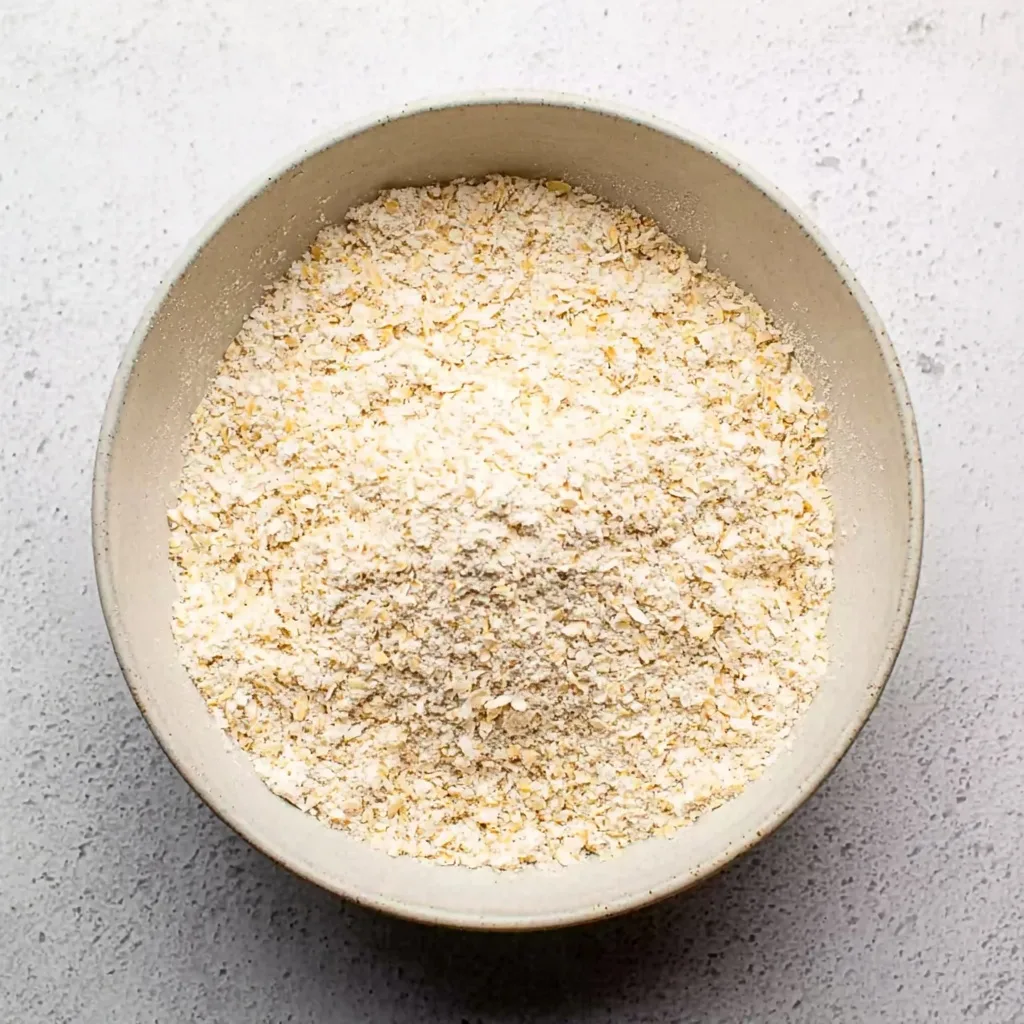
Step 2: Mix the Dry Ingredients
In a large bowl, stir together:
- Rolled oats
- Plain flour
- Desiccated coconut
- Brown sugar
Use a wooden spoon and mix until well combined — no need to sift anything here.
Step 3: Melt the Butter and Syrup
In a small saucepan over low heat, melt the butter and golden syrup together until smooth. Don’t let it boil — just warm until the butter has completely melted and the mixture is silky.
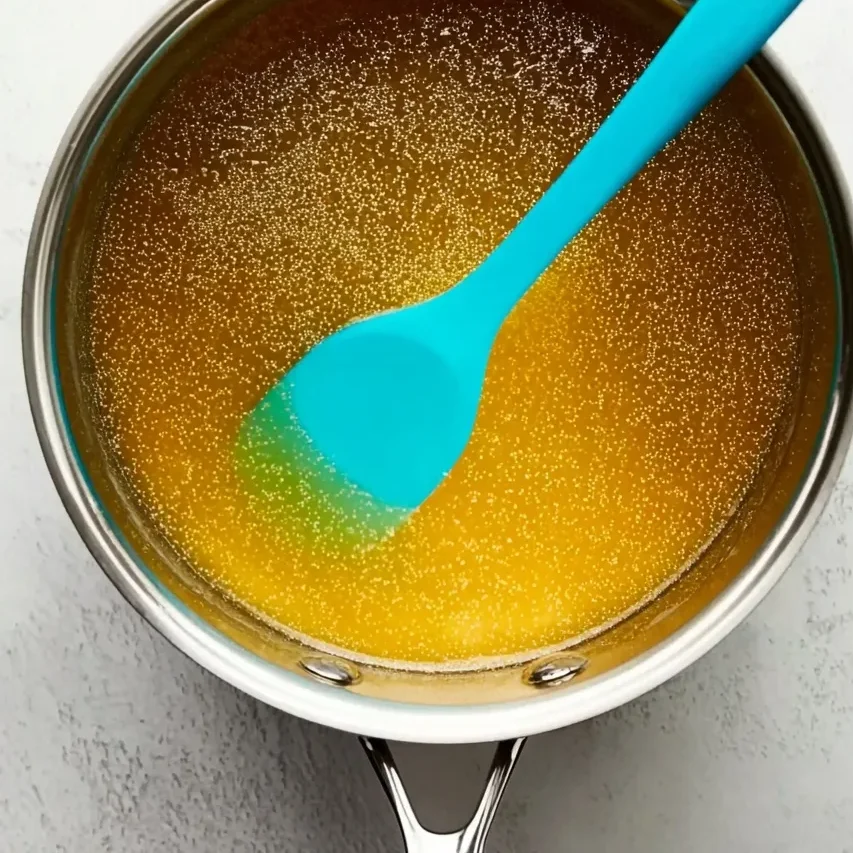
Step 4: Activate the Baking Soda
In a small bowl, dissolve the baking soda in the boiling water, then immediately pour it into the butter and syrup mixture. It will fizz up a little — that’s exactly what you want! Stir gently.
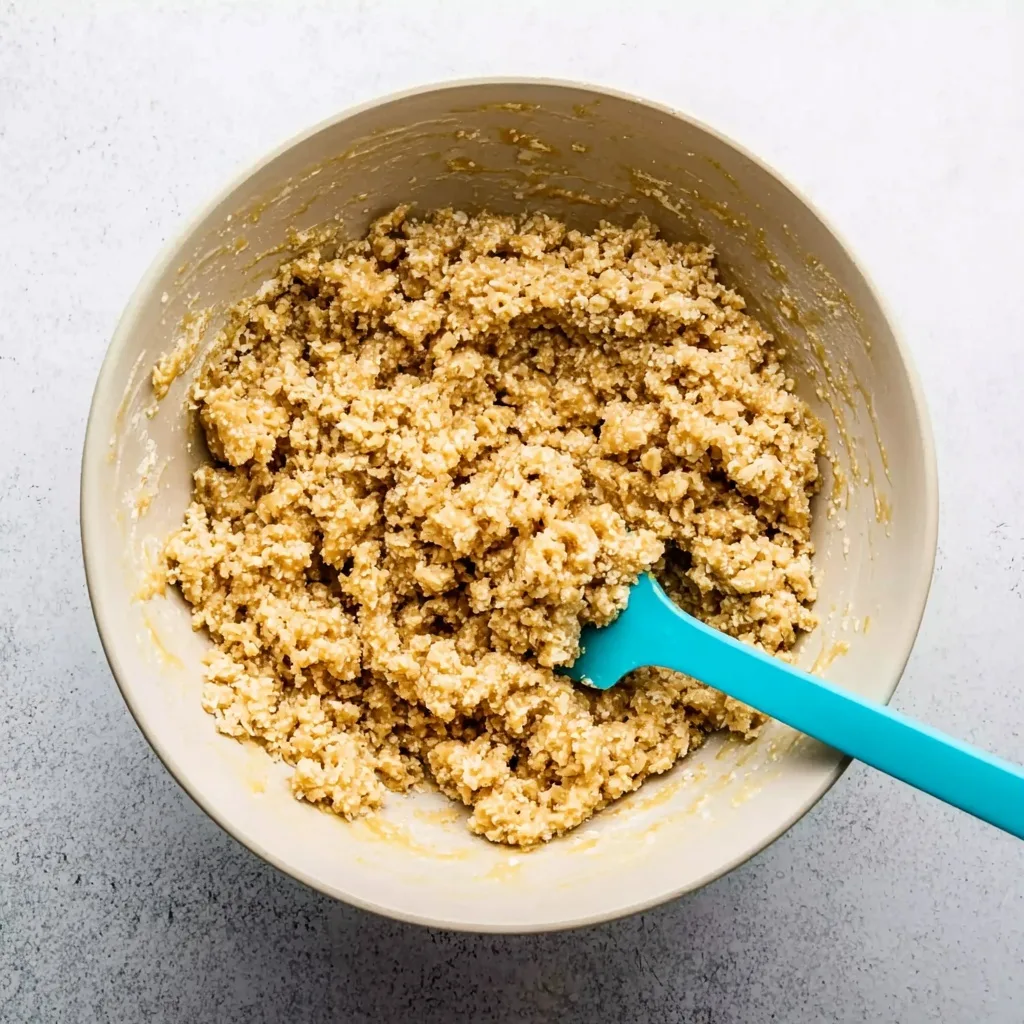
Step 5: Combine Wet and Dry
Pour the wet mixture into the bowl of dry ingredients. Stir until everything comes together. The mixture should be crumbly but moist enough to press into shape. If it’s too dry, add a tiny splash of water.
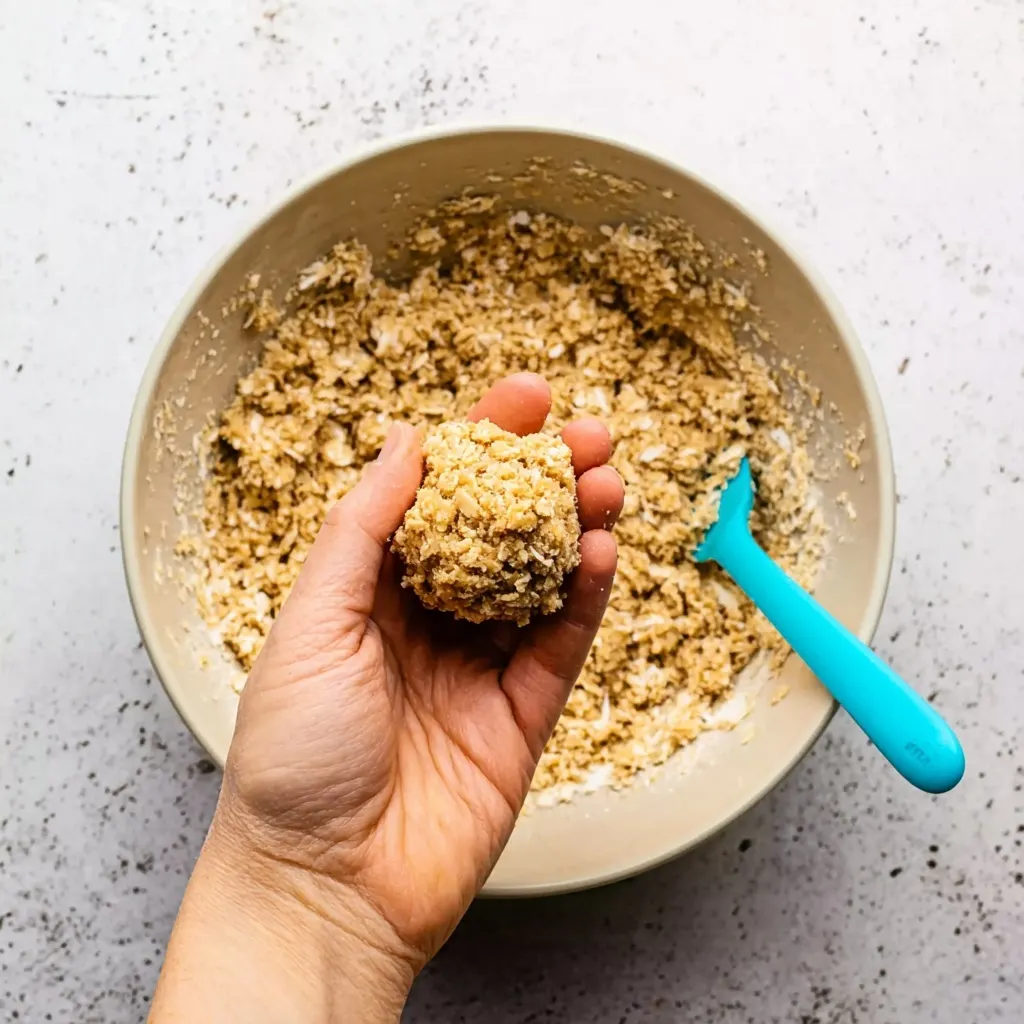
Step 6: Shape the Biscuits
Scoop out heaped tablespoons of the mixture, roll them into balls, and place them on your prepared tray. Leave space between each one — they’ll spread a bit. Gently press each ball down with your fingers or the back of a spoon.
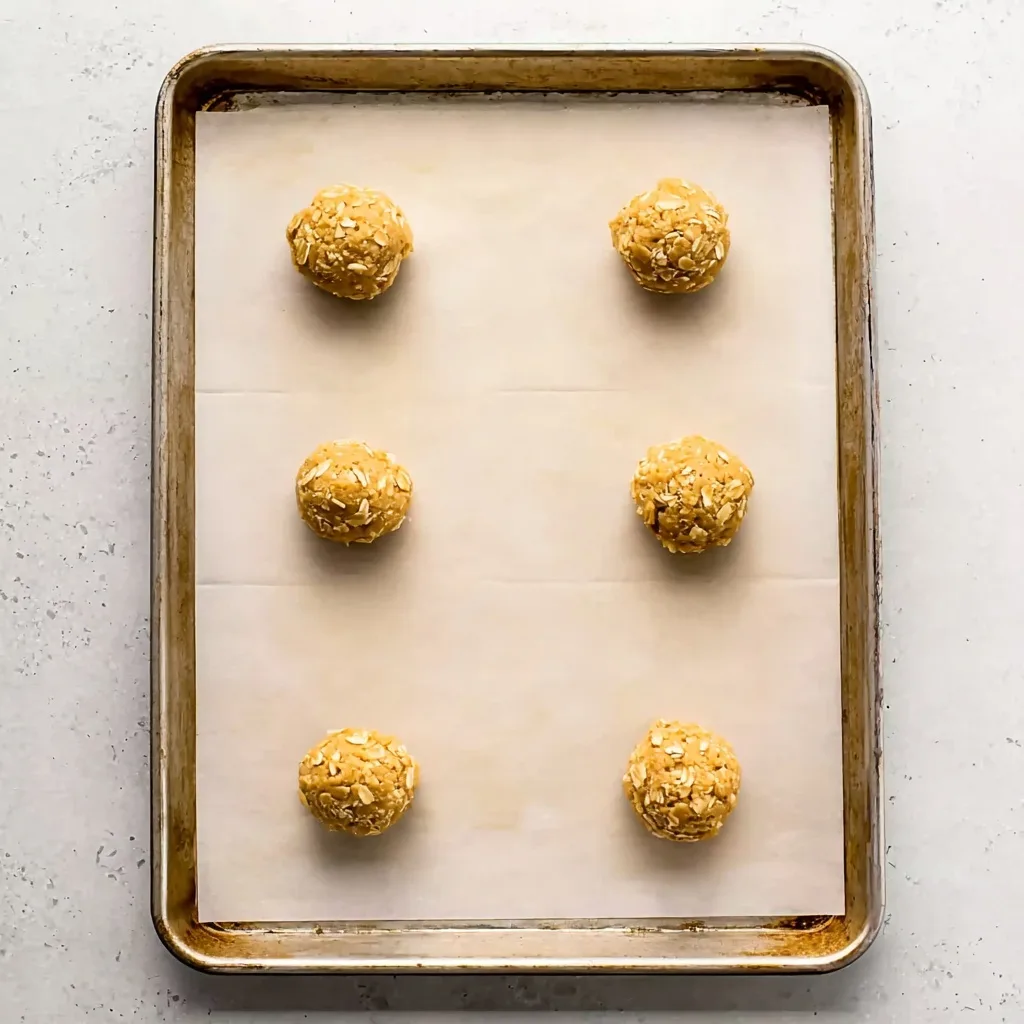
Step 7: Bake
- For chewy biscuits: Bake for 10–12 minutes, or until the edges are golden but the centers still look soft.
- For crisp biscuits: Bake for 14–16 minutes, or until fully golden and a little flatter.
Step 8: Cool Completely
Let the biscuits sit on the tray for 5 minutes to firm up, then transfer to a wire rack to cool completely. They’ll crisp up more as they cool — resist the urge to move them too early!
Baker’s Tip: If you want uniform edges, use a round cookie cutter to “scoot” the biscuits into shape just after baking — before they cool.
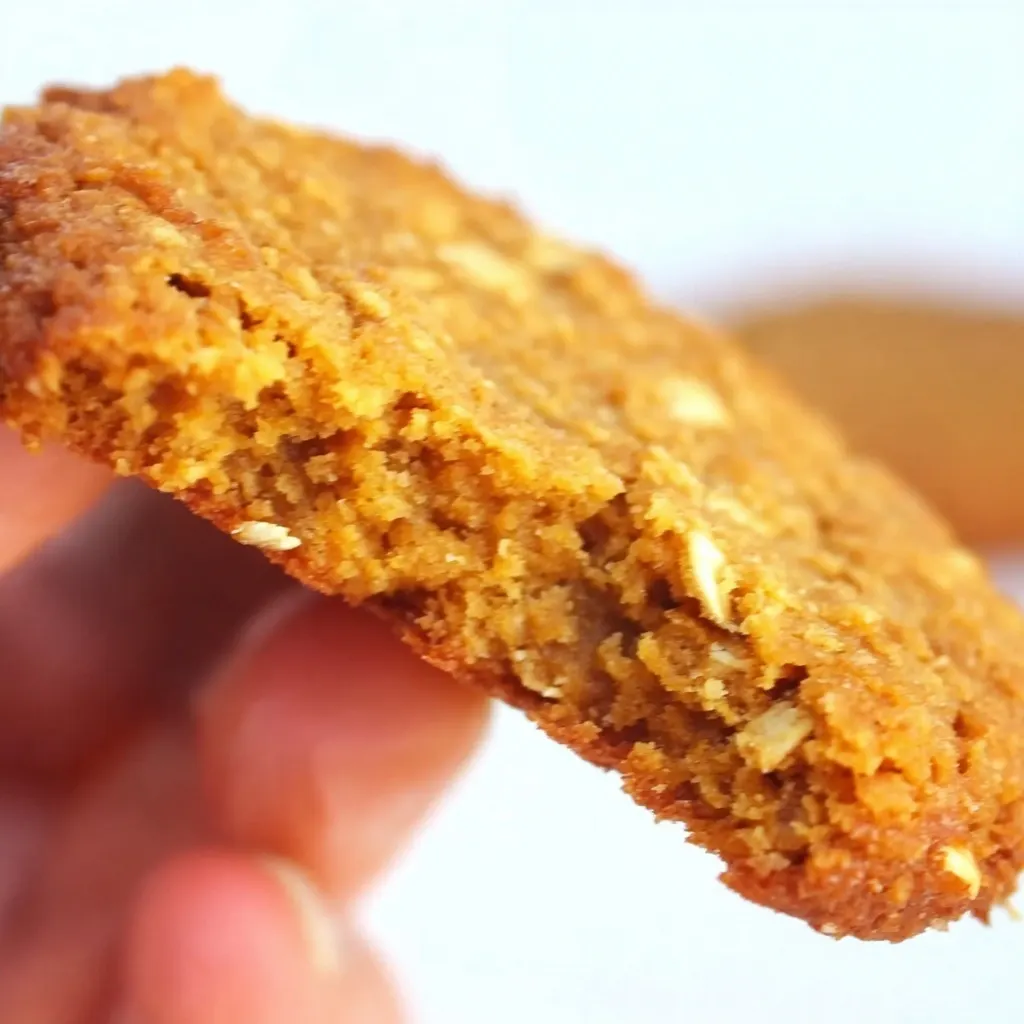
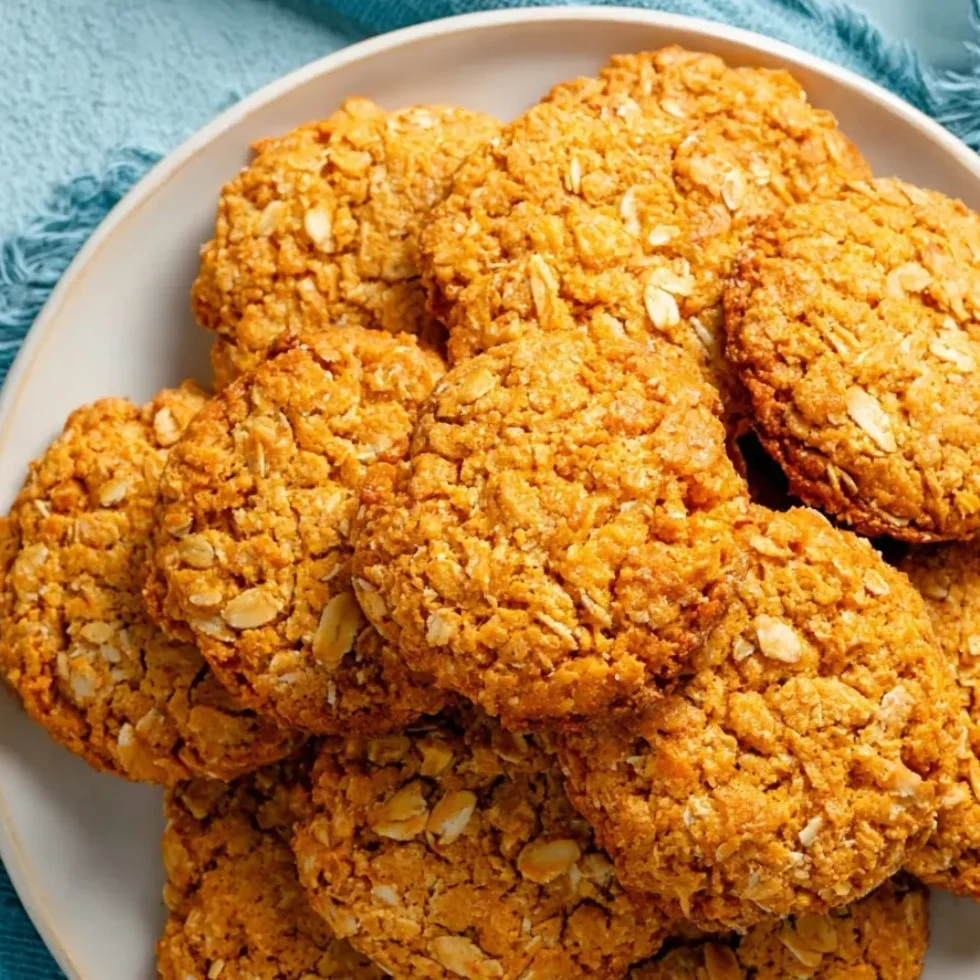
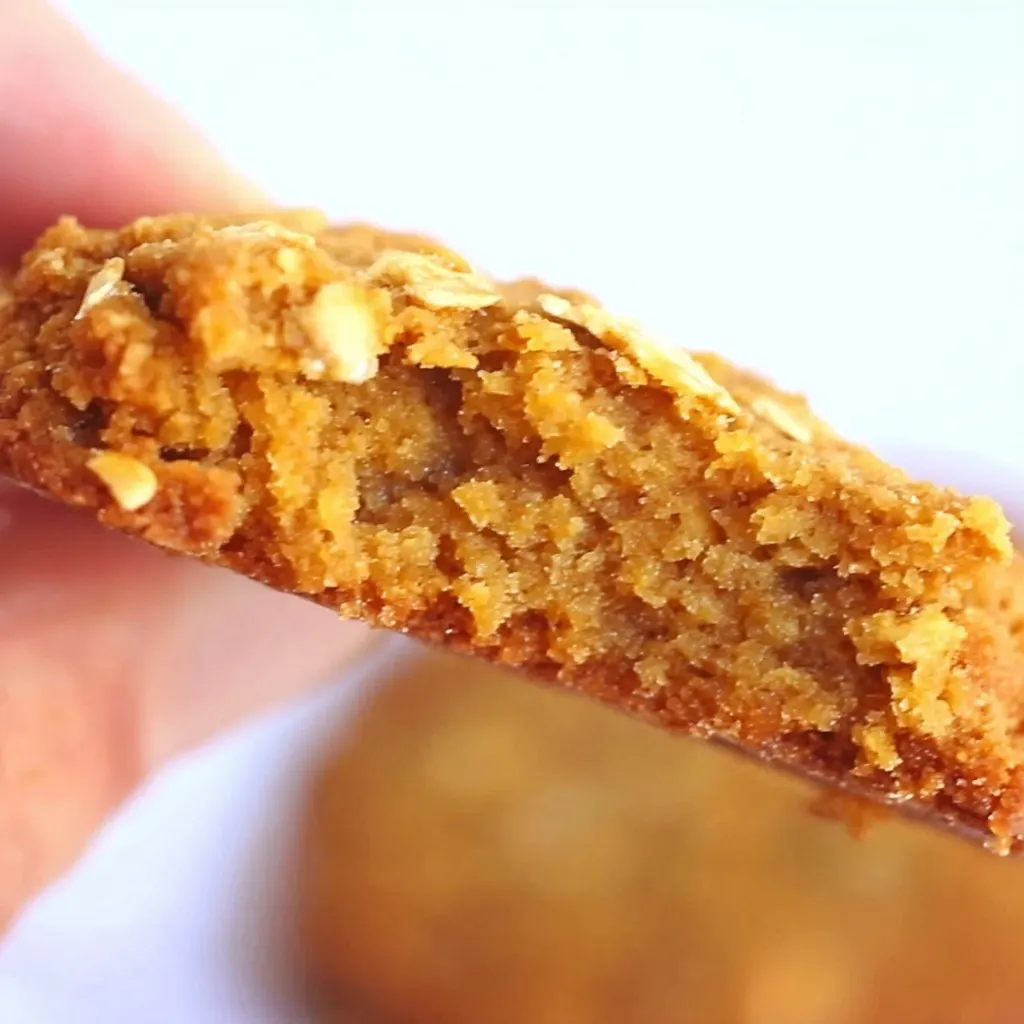
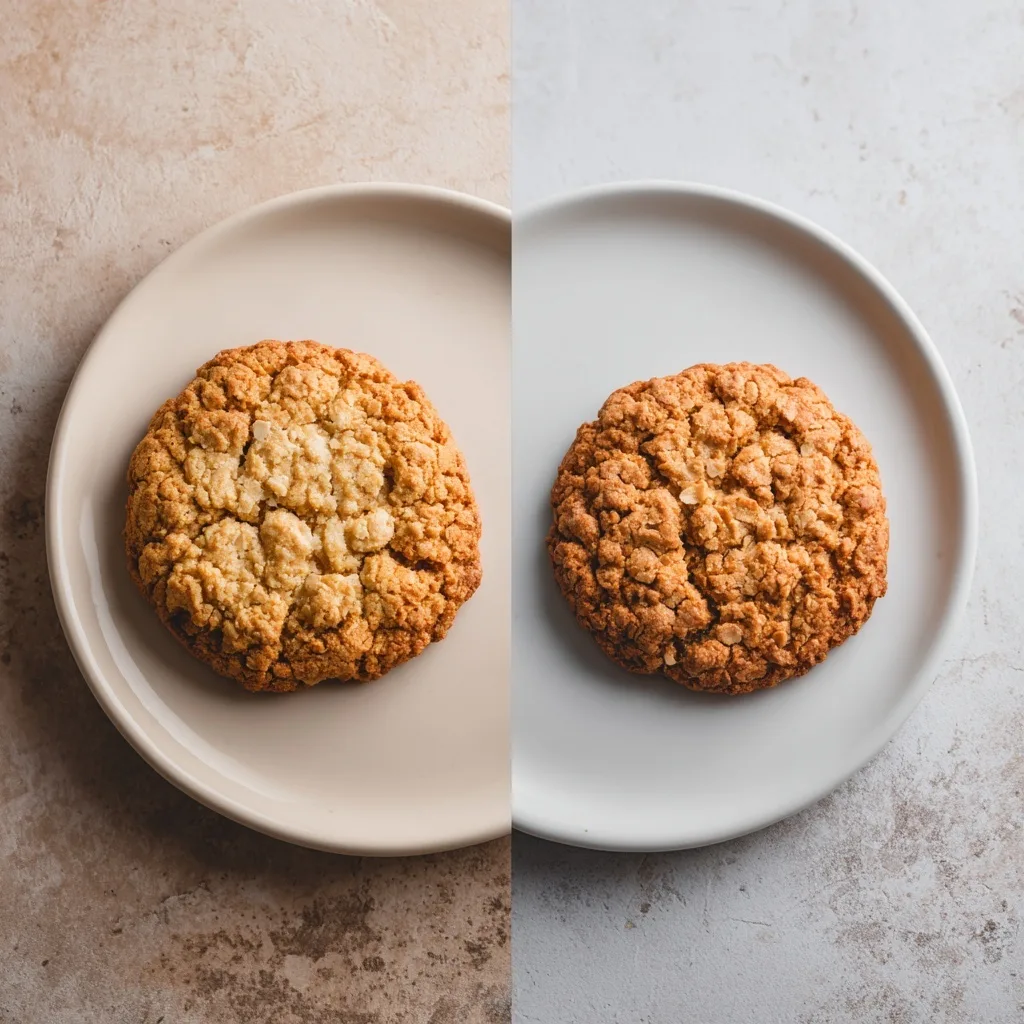
Chewy vs Crispy: How Do You Like Your Anzac Biscuits?
Everyone in my family has an opinion about this — my partner loves them chewy in the middle, while my mum won’t touch one unless it has a proper golden crunch. Luckily, this recipe makes it easy to adjust depending on your texture preference.
Here’s how I tweak the method:
For Chewy Anzac Biscuits:
- Baking Time: Bake for 10–12 minutes
- Dough Shape: Keep the dough balls slightly taller and press down just a little
- Sugar Tip: Brown sugar helps add softness — don’t swap for white!
- Cooling Trick: Let them cool on the tray for 5 minutes, then transfer to a rack while they’re still slightly soft in the middle.
These stay chewy even the next day — perfect for lunchboxes or with a cup of tea.
For Crispy Anzac Biscuits:
- Baking Time: Bake for 14–16 minutes
- Dough Shape: Flatten the balls a little more before baking
- Tray Trick: Bake on a light-colored tray for more even browning
- Cooling Tip: Let them cool completely on the tray to set fully
They’ll be golden all the way through, with that satisfying snap when you break one in half.
My Favourite Combo?
I usually do half the batch chewy and the other half crisp — that way, everyone’s happy! And honestly, they both keep really well, so I love having a mix on hand.
What’s your biscuit vibe?
Vote below or leave a comment — chewy or crispy?
More Aussie & Kiwi Classics You’ll Love
Want to keep the nostalgic baking going? These beloved recipes are just as iconic and easy to make — and perfect for lunchboxes, weekend bakes, or sharing with family:
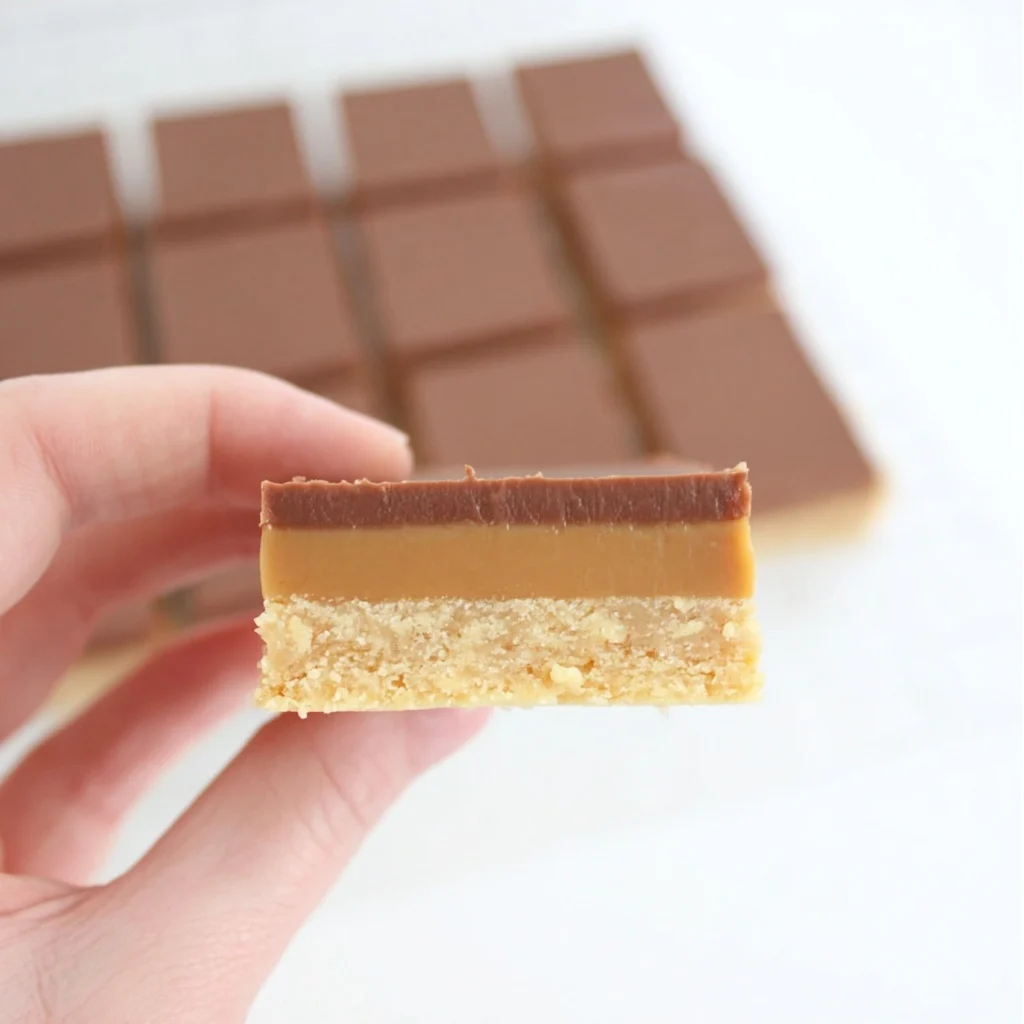
Caramel Slice – Buttery base, rich caramel, and a layer of chocolate you can’t say no to.
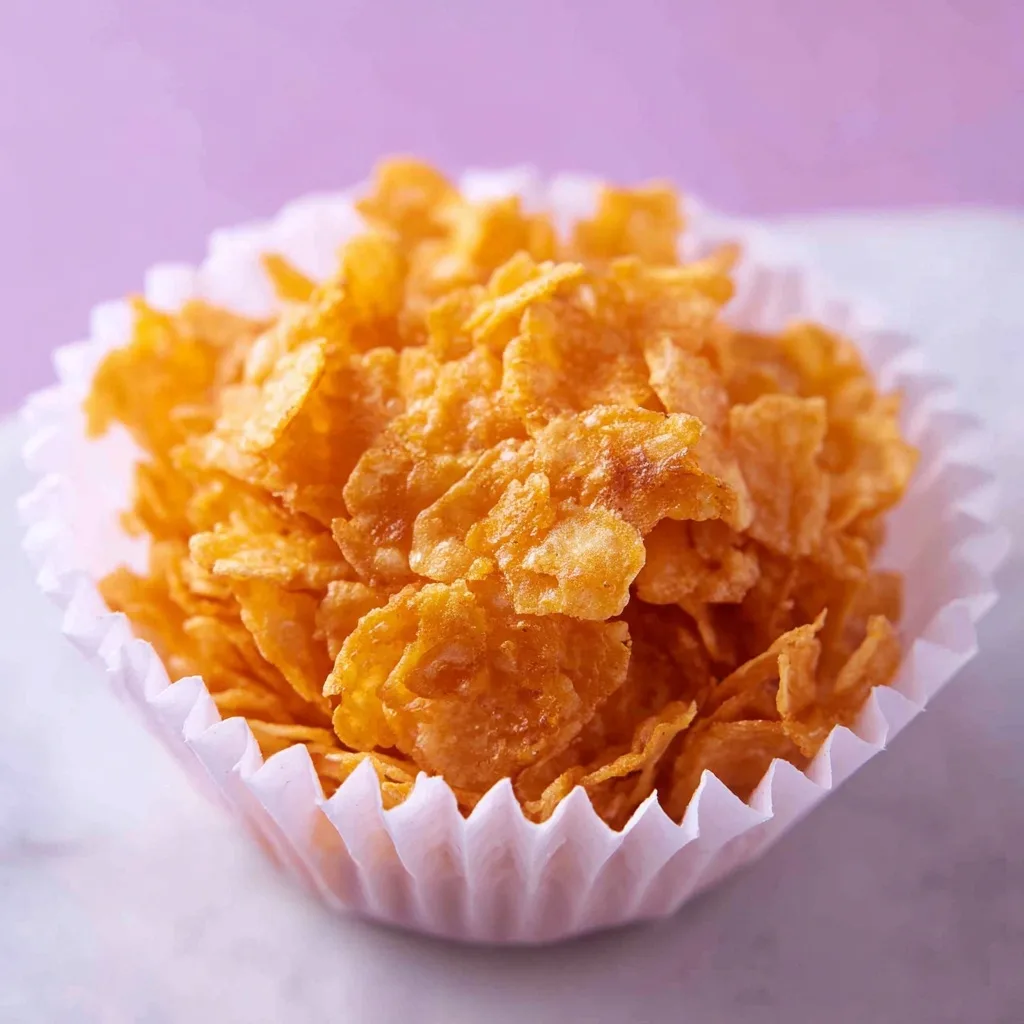
Honey Joys – Crunchy, golden cornflake treats made with just 4 ingredients.
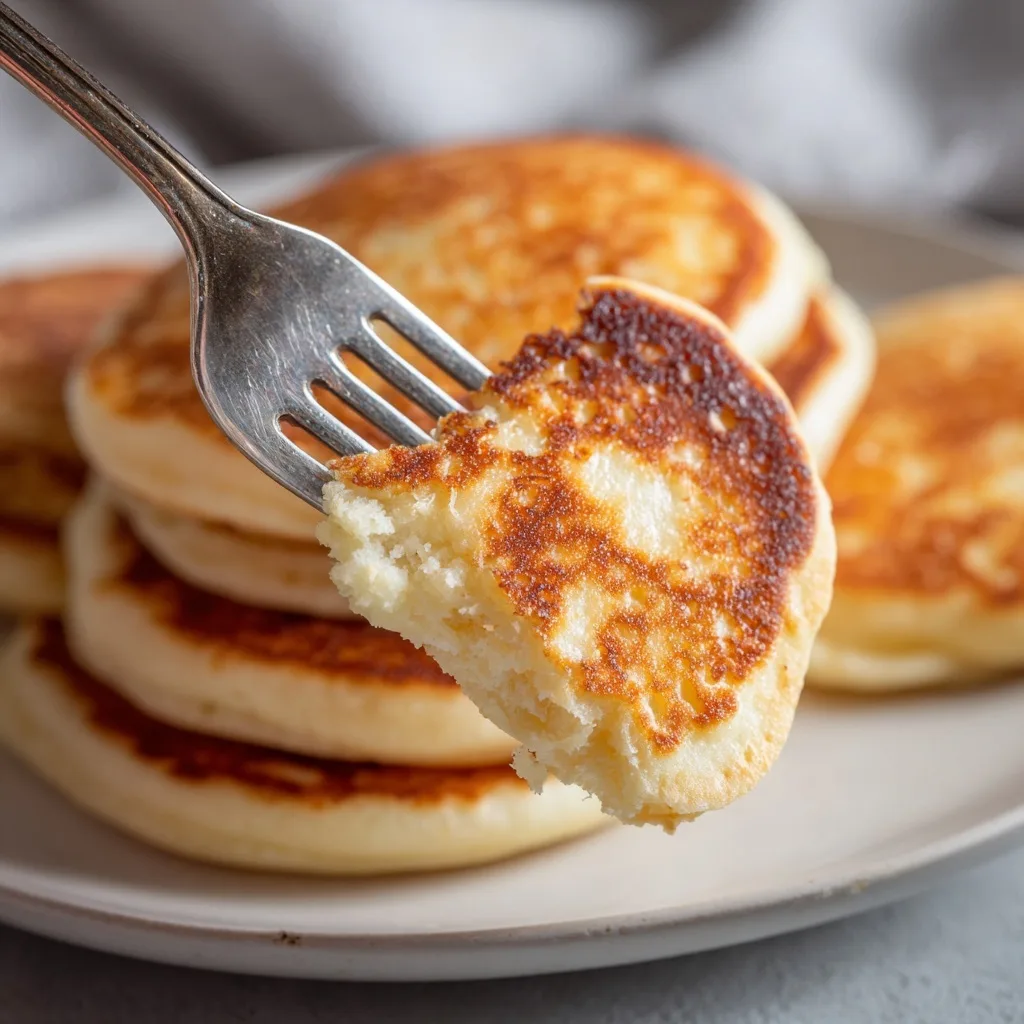
Classic Pikelets – Fluffy mini pancakes, perfect for afternoon tea or after-school snacks.
My Favourite Anzac Biscuit Variations
Tried-and-True Twists for Every Taste
Once you’ve nailed the classic, it’s so fun to play around with flavor. Over the years, I’ve experimented with all sorts of variations — some were flops (looking at you, lavender oats 😅), but these ones turned out beautifully and get requested often by family and friends.
Brown Butter Anzac Biscuits
Richer, deeper flavour — perfect for grown-up taste buds.
- Brown the butter before mixing it with golden syrup (don’t burn it!).
- Let it cool slightly, then continue with the recipe as usual.
- Adds a toasty, nutty depth that pairs beautifully with coconut.
Gluten-Free Version
Yes, they can still be chewy and perfect!
- Swap plain flour for gluten-free plain flour blend.
- Use certified gluten-free rolled oats (some oats are contaminated with gluten during processing).
- Keep everything else the same — no one will even know the difference.
Vegan Anzac Biscuits
My niece is vegan — and even she gives these a 10/10.
- Replace butter with refined coconut oil or a vegan butter substitute.
- Make sure your golden syrup is vegan (most are).
- Optional: add a dash of vanilla or maple for a little extra warmth.
Chocolate-Dipped
My not-so-traditional favourite — perfect for dessert trays.
- Once the biscuits have cooled, dip half in melted dark chocolate.
- Let them set on baking paper before storing.
- Adds a sweet, bitter contrast that balances the oatty flavour beautifully.
Spiced Anzacs (Optional Twist!)
I make these in autumn with a chai tea on the side.
- Add 1/2 tsp ground ginger, cinnamon, or even cardamom to the dry mix.
- Slightly less traditional, but so warming and fragrant.
How to Store, Freeze, and Gift Anzac Biscuits
Keep Them Fresh (If They Last That Long!)
I’ve made countless batches of these biscuits over the years — sometimes for Anzac Day, sometimes just because I need something quick and comforting with my tea. The good news? Anzac biscuits keep beautifully, and they’re freezer-friendly too!
Storage Tips
- Room Temperature:
Store in an airtight container (a tin is best) at room temperature for up to 2 weeks.
I like using a classic bikkie tin lined with parchment — keeps them crisp and pretty! - Chewy Tip:
If you love them chewy, pop a slice of bread in the container — it keeps the biscuits soft longer. - Crispy Tip:
Store with a silica gel packet or in a dry spot — moisture makes them lose crunch.
Freezing Tips
- Freeze After Baking:
Let the biscuits cool completely, then freeze in a zip-lock bag or airtight container for up to 3 months. Defrost at room temp — they hold up perfectly. - Freeze Dough Balls:
You can also freeze the raw dough! Shape into balls, place on a tray, freeze until firm, then store in a freezer bag. When ready to bake, place on tray, thaw slightly, then bake as usual.
Gifting Ideas
These biscuits make thoughtful homemade gifts, especially around Anzac Day or as a care package.
- Wrap a stack in parchment and tie with twine
- Add a printed tag explaining the Anzac story
- Pop them in a jar or tin with a ribbon
Nutrition & Allergen Info
What’s Inside One Classic Anzac Biscuit?
This is an estimate based on the traditional recipe using standard ingredients. If you swap or tweak, the values will change slightly — but this gives you a good ballpark.
| Per Biscuit (approx. 30g) | Amount |
|---|---|
| Calories | ~135 kcal |
| Total Fat | 6g |
| Saturated Fat | 3.5g |
| Carbohydrates | 18g |
| Sugars | 8g |
| Protein | 1.6g |
| Fiber | 1.2g |
| Sodium | 60mg |
Allergen Notes
- Contains:
- Gluten (from plain flour and oats)
- Dairy (from butter)
- Coconut
- Can be made:
- Gluten-Free – with GF flour + certified GF oats
- Dairy-Free/Vegan – by using coconut oil instead of butter
- Nut-Free – as written (unless you choose almond meal as a sub)
I always recommend checking packaging if you’re baking for someone with allergies — some oats and coconuts are processed in shared facilities.
Want to learn more about how nutrition is calculated?
Check out this Nutrition Data Guide from the USDA for ingredient-level info.
Frequently Asked Questions
Your Anzac Biscuit Questions — Answered
Can I use quick oats instead of rolled oats?
You can, but I wouldn’t recommend it if you’re after that classic texture. Quick oats tend to make the biscuits a bit softer and less chewy. Rolled oats give you that lovely bite and rustic look — it’s what I always use.
How do I get perfectly round Anzac biscuits?
After baking, while they’re still soft, I gently “scoot” a round cookie cutter around each one to shape them into perfect circles. It’s a simple little trick, and the results look so professional!
Can I double or halve the recipe?
Absolutely! I double it often — they freeze well and are great for sharing. Just be sure to watch the baking time; if your biscuits are larger, they may need an extra minute or two.
How long do Anzac biscuits last?
Stored in an airtight container, they’ll stay fresh for up to 2 weeks. You can also freeze them for up to 3 months (baked or raw). I always tuck some away for surprise visitors or busy mornings.
Can I make Anzac biscuits without coconut?
Yes — I’ve done it plenty of times when I’ve run out. Just add extra oats or sub in some almond meal. The texture will change a bit, but they’ll still be delicious.
What’s a good substitute for golden syrup?
Honey or maple syrup work well in a pinch, but nothing quite beats the rich caramel flavour of golden syrup. If you’re outside Australia or NZ, look for Lyle’s Golden Syrup online — it’s worth it.
What makes Anzac biscuits crunchy or chewy?
It all comes down to baking time and thickness. For chewy biscuits, bake them for a shorter time and keep them slightly thicker. For a crunchier bite, flatten them more and bake a little longer. The amount of golden syrup and moisture in the dough also affects texture — I’ve shared tips for both styles in the recipe above!
Why are Anzac biscuits called that?
The name “Anzac” stands for Australian and New Zealand Army Corps. These biscuits were made during World War I and sent to soldiers because they kept well without refrigeration. Over time, they became a symbol of home, comfort, and remembrance — especially on Anzac Day, April 25th.
What do Americans call Anzac biscuits?
There’s no direct American version, but the closest comparison would be oatmeal cookies. That said, Anzac biscuits are eggless, contain coconut, and have a distinct golden syrup flavour — so they’re quite different in taste and texture.
Why are there no eggs in Anzac biscuits?
Anzac biscuits were originally made without eggs so they would last longer during shipping in wartime. Eggs were also scarce, and skipping them helped the biscuits stay crisp or chewy without spoiling. It’s part of what makes the recipe beautifully simple.
Printable Recipe
Anzac Biscuits Recipe
These classic Anzac biscuits are golden, chewy, and rich with the flavor of oats, coconut, and golden syrup. A beloved treat in Australia and New Zealand, they’re easy to make, egg-free, and perfect for lunchboxes, tea time, or snacking. Whether you like them soft and chewy or thin and crispy, this recipe has all the tips to make them just how you love!
Ingredients
- 1 cup (90g) rolled oats
- 1 cup (150g) plain flour
- 1 cup (85g) desiccated coconut
- 3/4 cup (150g) brown sugar
- 125g (1/2 cup) unsalted butter
- 2 tablespoons (40g) golden syrup
- 1/2 teaspoon baking soda
- 2 tablespoons boiling water
Instructions
- Preheat your oven to 160°C (320°F) fan-forced. Line two baking trays with baking paper.
- In a large bowl, mix oats, flour, coconut, and brown sugar until combined.
- In a small saucepan over low heat, melt the butter and golden syrup together until smooth.
- In a small bowl, dissolve the baking soda in the boiling water. Add it to the butter mixture — it will bubble slightly
- Pour the wet mixture into the dry ingredients and stir until evenly combined.
- Roll tablespoons of dough into balls and place them on the prepared trays. Flatten slightly with your fingers or the back of a spoon.
- Bake for 10–12 minutes for chewy biscuits, or 14–16 minutes for crispy ones.
- Let the biscuits cool on the tray for 5 minutes before transferring to a wire rack.
Notes
Nutrition Information:
Yield: 20 Serving Size: 1Amount Per Serving: Calories: 135Total Fat: 6gCarbohydrates: 18g
Nutritional information is an estimate based on standard ingredients and serving sizes. Actual values may vary depending on specific products used and portion sizes. Always consult a qualified nutritionist or dietitian for precise dietary advice.
Ready to Bake Your Own Anzac Biscuits?
If you’ve made it this far, you’re more than ready to master the humble Anzac biscuit — and honestly, once you’ve made them once, they tend to become a regular in the biscuit tin. Whether you go chewy or crisp, classic or with a twist, these bikkies always deliver comfort and connection in every bite.
I’d love to hear how yours turn out — do you stick with tradition, or have your own family twist? Leave a comment below and let’s share our favourite bakes! And if you snap a photo, tag me on Instagram — I love seeing your kitchen creations.
Thanks for baking with me 💛