The Ultimate Caramel Slice Recipe: My Foolproof Aussie Favourite
Let me tell you — I’ve made this caramel slice recipe more times than I can count. It’s been my go-to for school bake sales, arvo teas with the girls, and late-night cravings when I just need something sweet. If you’re after a foolproof caramel slice recipe that nails that buttery base, golden caramel and snappy chocolate top — this is the one.
I know how frustrating it is when your caramel splits or your chocolate cracks when cutting. Been there! But after a heap of trial and error (and many taste tests, of course), I’ve finally perfected it.
In this step-by-step guide, I’ll walk you through exactly how to make the best caramel slice recipe — the kind that disappears in seconds and always gets asked for again. And if you’re dairy-free, gluten-free, or just love mixing things up, I’ve included some flavour-packed variations too.
This caramel slice recipe is also perfect for special occasions like birthdays or family gatherings — it’s a real crowd-pleaser. You can even freeze slices in advance for quick treats on the go.
Ready to make an Aussie classic that’ll earn you compliments every time? Let’s bake this caramel slice recipe to perfection!
A Slice of History: Where Caramel Slice Comes From
You’ve probably had a slice like this at a café or maybe your mum made it growing up — but did you know caramel slice recipes have a rich history in Aussie kitchens?
While they share roots with the British millionaire’s shortbread, Australians made this layered sweet their own. The Scots may have introduced the shortbread base, but we added that thick, creamy condensed milk caramel and rich chocolate topping. This twist turned it into an iconic Aussie treat found at school fetes, office teas, and birthday tables everywhere.
There’s something comforting about making your own caramel slice recipe — the scent while it bakes, the smooth caramel layer, and that satisfying chocolate snap. It’s nostalgic, easy to personalise, and absolutely irresistible. Whether you’re baking it for the first time or perfecting your signature version, this caramel slice recipe never fails to impress.
Ingredients You’ll Need
Pantry Staples, Nothing Fancy
Here’s everything you’ll need to make this caramel slice recipe — and chances are, you already have most of it sitting in your pantry. I’ve also included a few optional swaps in case you’re making a gluten-free or vegan version (scroll down for full details later on). Whether you’re baking it for a weekend treat or prepping for a special event, this caramel slice recipe is as adaptable as it is delicious.
For the Biscuit Base:
- 1½ cups plain sweet biscuits, crushed (like Marie or Digestives)
- 125g unsalted butter, melted
Tip: Blitz your biscuits in a food processor or bash them in a ziplock bag with a rolling pin — both work!
For the Caramel Layer:
- 1 x 395g can sweetened condensed milk
- 60g unsalted butter
- ⅓ cup brown sugar, packed
This combo creates that golden, silky caramel we all love — no shortcuts here!
For the Chocolate Topping:
- 200g dark or milk chocolate, chopped
- 1 tsp neutral oil (like vegetable or coconut) — helps slice cleanly without cracking
Dark chocolate gives a nice contrast to the sweetness, but use your fave — even white works if you’re feeling fancy.
Step-by-Step Instructions (With Real-Life Tips!)
If it’s your first time making this caramel slice recipe, don’t stress — I’ve got your back. Just follow these steps and you’ll have a perfectly layered slice that cuts like a dream and tastes even better. Once you’ve mastered this caramel slice recipe, you’ll find yourself coming back to it for every occasion.
Step 1: Make the Biscuit Base
- Preheat your oven to 180°C (160°C fan-forced) and line a 20x20cm or similar slice tin with baking paper. Let the paper hang over the sides for easy lifting later.
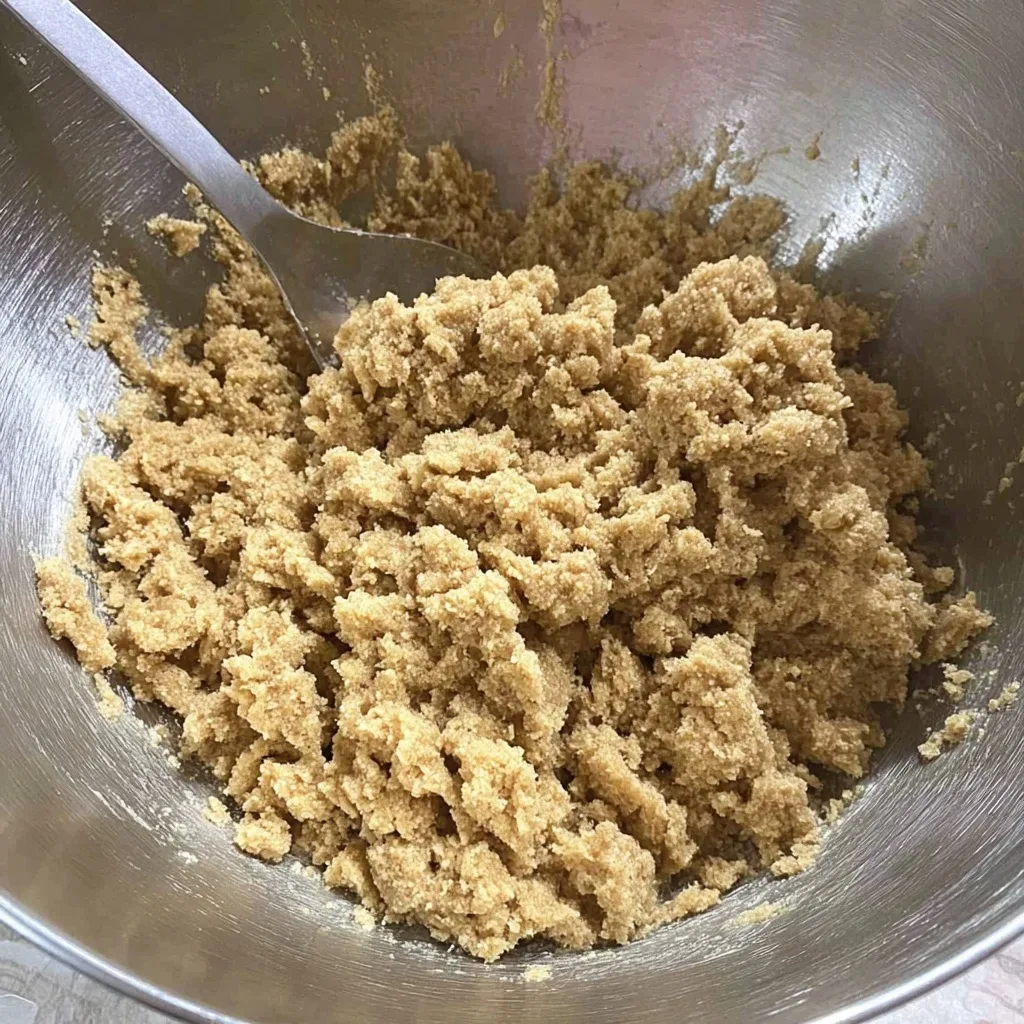
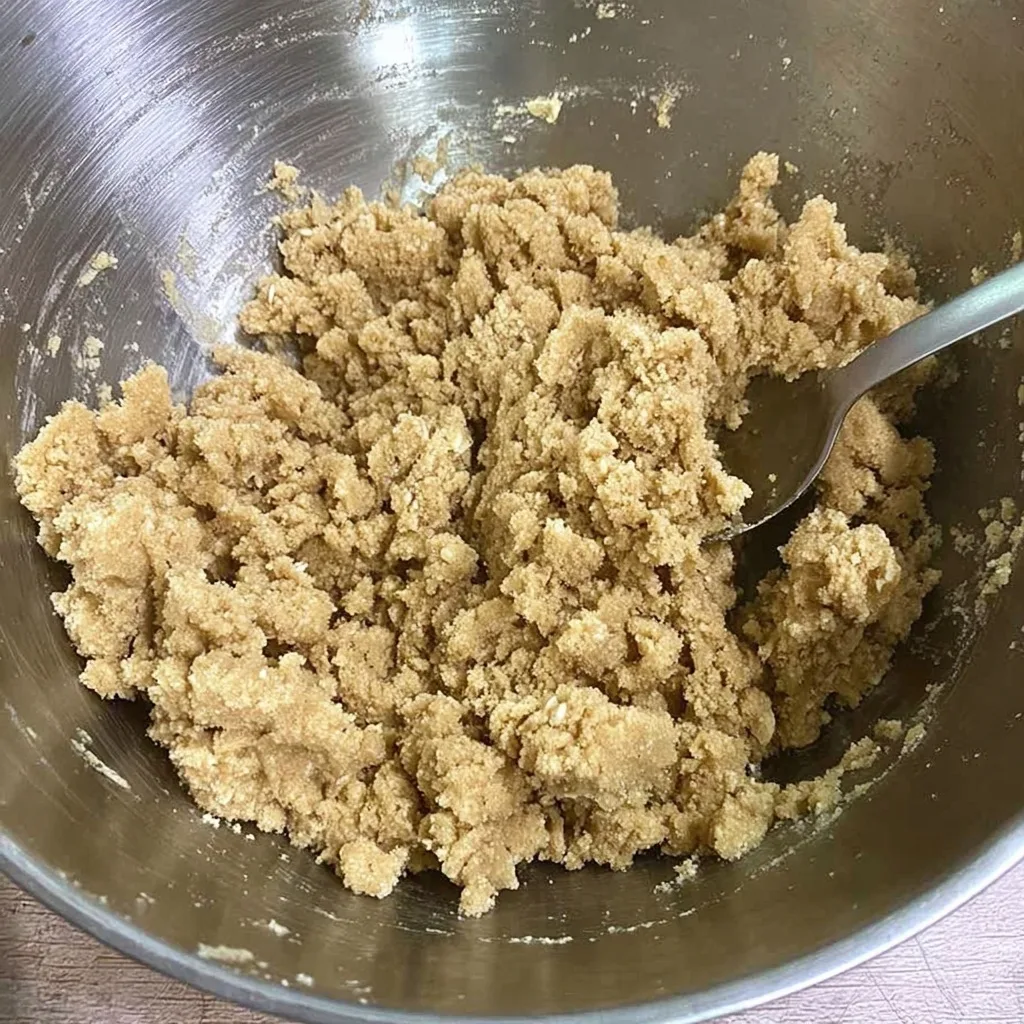
- Crush your biscuits until fine (I use a food processor, but bashing them in a bag works too!).
- Stir in the melted butter until the mixture looks like wet sand.
- Press it firmly and evenly into the base of your prepared tin — I like using the back of a spoon for a nice smooth finish.
- Bake for 10 minutes, then set aside to cool slightly while you make the caramel.
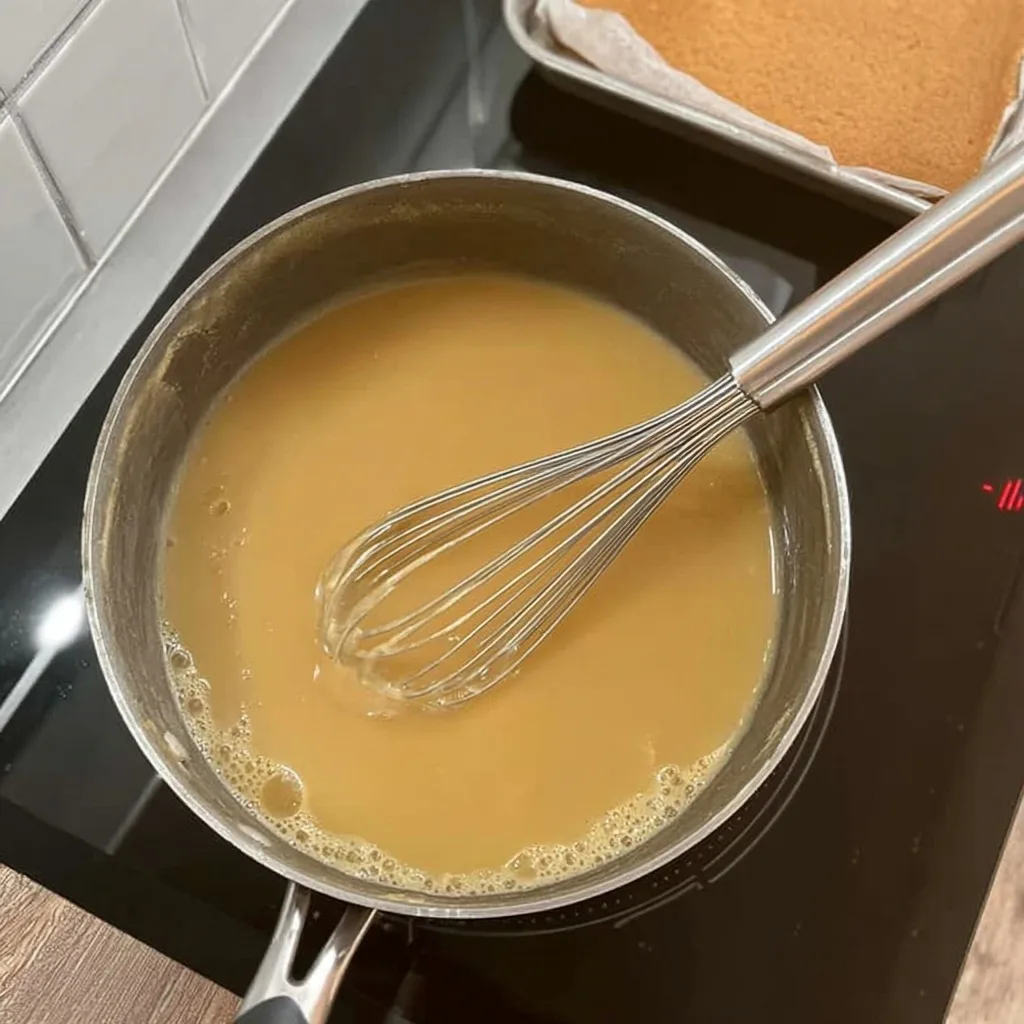
Step 2: Cook the Caramel Filling
- In a medium saucepan, add the condensed milk, butter, and brown sugar.
- Stir over medium-low heat for around 8–10 minutes, or until the mixture thickens and turns a light golden colour.
- Make sure to stir constantly — don’t walk away! The caramel can catch and burn quickly if left unattended.
“This is where the magic happens: the sugar slowly transforms through caramelisation, creating those deep, rich toffee notes we all love.” - Once thick and glossy, pour it evenly over the slightly cooled base. Use the back of a spoon (dipped in water!) to spread it out.
Personal Tip: You’ll know it’s ready when the caramel coats the back of your spoon and leaves a trail when stirred.
- Pop the tray back in the oven and bake for another 12 minutes, just to help it set.


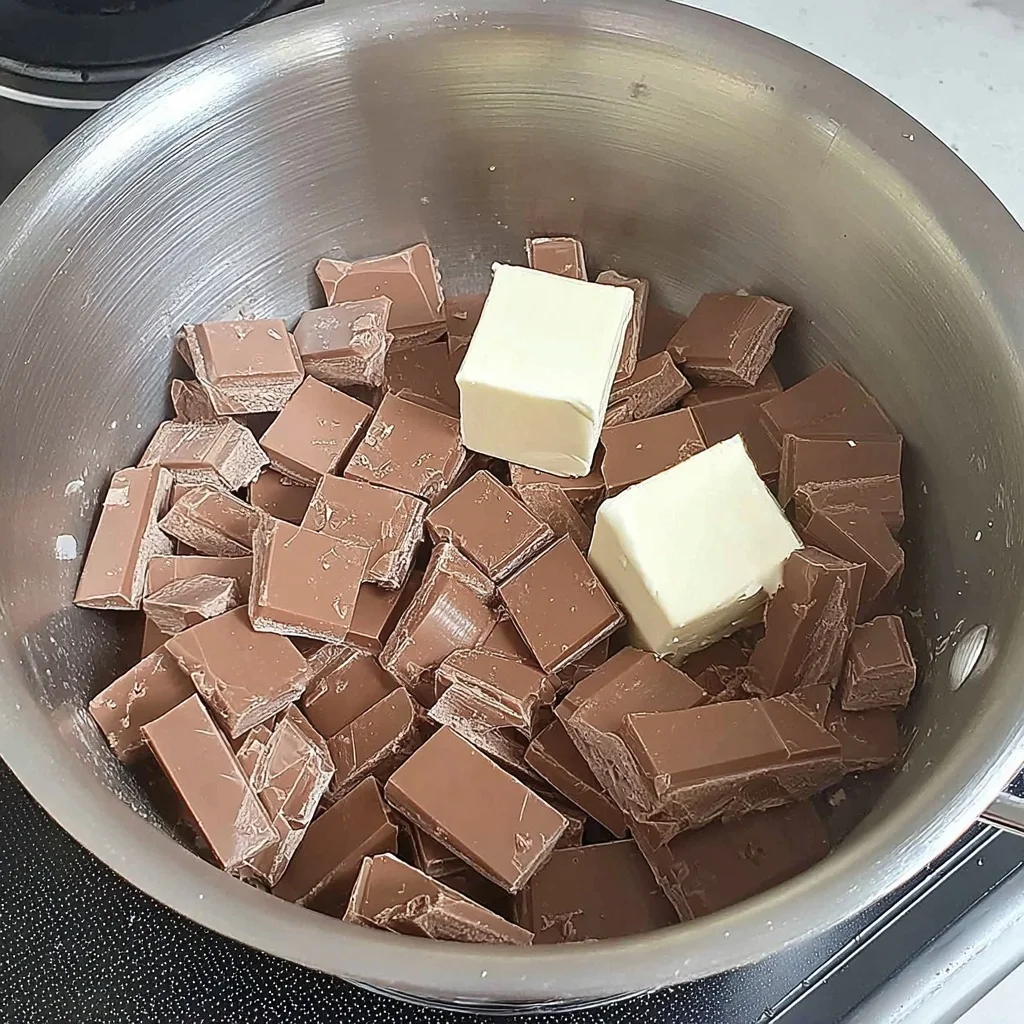
Step 3: Add the Chocolate Topping
- Once the caramel has cooled completely (this part is important!), melt your chocolate and oil together. You can use a microwave in 30-second bursts or a bowl over simmering water.
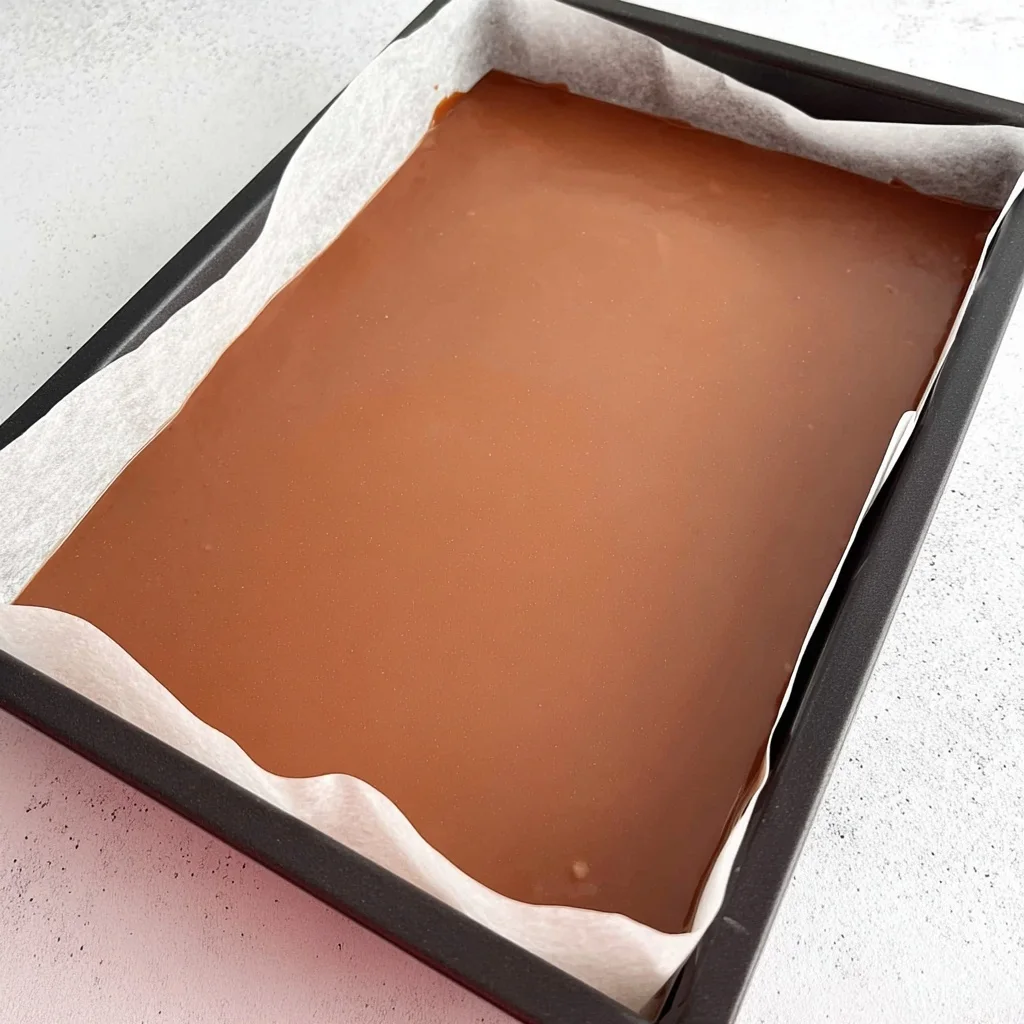
- Pour the melted chocolate over the caramel layer and gently tilt the pan to spread it evenly. Avoid using a spatula unless needed — it can mess up the surface.
- Pop it in the fridge for about 1–2 hours, or until set firm.

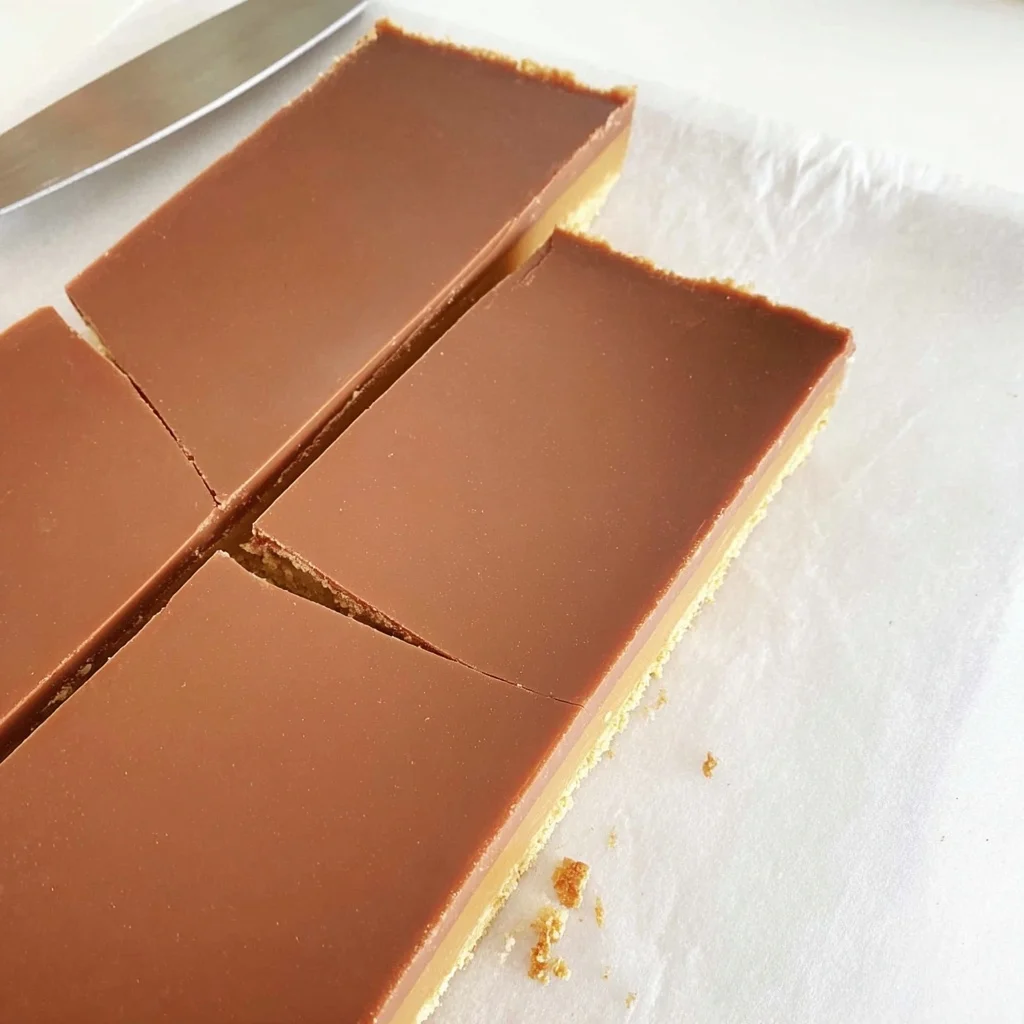
Slice Tip: Use a sharp knife dipped in hot water and wiped dry to get clean slices without cracking the chocolate.

Troubleshooting Tip:
If your chocolate cracks when cutting, it usually means it’s too cold. Let the slice sit at room temp for 10 minutes before slicing — works like a charm.
Total Time Estimate:
- Prep: ~20 mins
- Bake: 20–25 mins
- Chill: 1–2 hrs
- Hands-on effort? Minimal. Impressiveness? Maximum.
Love this caramel slice? You’ll definitely want to try my Tofu Chocolate Pudding — it’s rich, creamy, and totally dairy-free.
Expert Tips from My Kitchen
After making this caramel slice recipe more times than I’d like to admit, I’ve picked up a few golden rules that really make a difference. Here are my tried-and-tested tips to help you nail it every time:
Wet Your Spoon Before Spreading
Want smooth, even caramel? Wet the back of a metal spoon with cold water before spreading — it glides like magic and stops the caramel from sticking and tearing.
Don’t Rush the Caramel
If you crank the heat to speed things up, the caramel can split or burn. Keep it low and slow, and stir constantly. You’ll thank yourself later.
Use a Hot Knife for Clean Cuts
Run your knife under hot water and wipe it dry before each cut. It slices through the chocolate like butter — no cracks or jagged edges.
Let the Chocolate Set — But Not Rock Hard
If the chocolate’s too firm, it’ll crack when you slice. I like to take the slice out of the fridge about 10 minutes before cutting. Just enough to soften the top layer slightly.
Want an Even Base?
When making this caramel slice recipe, I always use a flat-bottomed glass or measuring cup to press the biscuit mixture into the tin — it gives a super even, professional-looking base every time.
These little tricks turn a good caramel slice into a spectacular one — and once you try them, you’ll never go back.
Flavour Twists & Variations to Try
Personalise Your Caramel Slice Recipe
One of the best things about this caramel slice recipe is how easily you can customise it to suit your mood, dietary needs, or what’s in the pantry. Here are a few of my favourite spins on the classic.
Salted Caramel Slice
Add ½ tsp sea salt flakes to the caramel layer before baking, or sprinkle some on top of the chocolate once set. It balances the sweetness and gives it that gourmet feel — perfect for grown-up gatherings.
Pro tip: Maldon or flaky sea salt works best — skip table salt, it’s too harsh.
Vegan Caramel Slice
Dairy-free and still delish! Here’s how to swap it:
- Use vegan biscuits for the base (like Lotus Biscoff or Orgran)
- Replace butter with vegan block butter or coconut oil
- Swap condensed milk for coconut condensed milk
- Use dairy-free chocolate for the topping
It’s rich, creamy, and even non-vegans will go back for seconds!
Gluten-Free Version
Just replace the biscuits with a gluten-free alternative — I like using Arnott’s GF Scotch Fingers or Schär Digestives. Everything else stays the same.
Bonus: This version often holds together better too!
White Chocolate Raspberry
Use white chocolate instead of dark and sprinkle the top with freeze-dried raspberries before it sets. It’s tart, sweet, and looks stunning on a dessert table.
Espresso Hazelnut
Stir 1 tsp instant espresso powder into the caramel and sprinkle chopped toasted hazelnuts over the chocolate layer. This one’s a coffee lover’s dream!
No matter which variation you choose, they all start with the same reliable base. You can even make a few different kinds in one big tray by dividing it into sections — just mark each with a topping so you remember which is which!
Storage, Freezing & Make-Ahead Tips
Keep Your Caramel Slice Fresh (or Freeze for Later!)
Once you’ve made this delicious caramel slice recipe, the next question is: how do you store it so it stays perfect?
Whether you want to prep ahead for a party or just sneak a slice during the week (guilty!), here’s how to do it right:
Storage in the Fridge
- Store in an airtight container in the fridge
- Keeps fresh for up to 5 days
- Best enjoyed slightly chilled, but not rock-hard cold
Personal tip: I like to cut mine into squares first, then layer them in a container with baking paper between layers to stop them sticking together.
Freezing Caramel Slice
Yes, it freezes beautifully!
- Slice before freezing for easy grab-and-go portions
- Wrap slices in baking paper, then place in a ziplock bag or airtight container
- Freezes well for up to 2 months
- Thaw in the fridge overnight or let sit at room temp for 15 minutes
Make-Ahead Tips
- You can make the base and caramel layers a day ahead, then add the chocolate topping the next morning
- Great for party planning or making during a quiet moment
- Freezes well even after being cut — no soggy layers!
With the right storage, your caramel slice will taste just as good on day five as it did straight out of the fridge — assuming it lasts that long!
Frequently Asked Questions (FAQ)
Got questions about making the perfect caramel slice recipe? You’re not alone! These are the ones I get asked most often — along with a few handy tricks I’ve picked up over the years.
Why is my caramel runny or too soft?
That usually means it wasn’t cooked long enough. The caramel needs to simmer gently for about 8–10 minutes until it thickens and darkens slightly. Stir constantly, and don’t walk away — it can go from perfect to burnt fast!
How do I stop the chocolate from cracking when I cut it?
Add a teaspoon of neutral oil (like vegetable or coconut) to your melted chocolate before pouring. And always use a hot knife — run it under hot water and dry it between cuts. Trust me, it makes a huge difference.
Can I double this caramel slice recipe?
Absolutely! Just use a larger rectangular tray (like 33x23cm) and add a few extra minutes to each bake time. It freezes beautifully, so it’s worth making more.
How long does caramel slice last?
In the fridge: up to 5 days
In the freezer: up to 2 months
Just make sure it’s stored in an airtight container or wrapped well to keep the layers fresh.
Can I make this gluten-free or vegan?
Yes — it’s super flexible!
For gluten-free, use GF biscuits.
For vegan, swap the butter, condensed milk, and chocolate with dairy-free alternatives (I’ve listed exact swaps above in the Variations section).
Why did my base crumble when I sliced it?
Usually, it’s from not pressing the base in firmly enough or using too little butter. Next time, try using the bottom of a glass or measuring cup to press it down evenly and firmly.
What’s the difference between caramel slice and millionaire’s shortbread?
They’re very similar, but millionaire’s shortbread typically has a traditional shortbread base and is more common in the UK. Caramel slice is the Aussie twist — made with crushed biscuit base and often has a slightly softer, gooier caramel.
Have a question I didn’t cover? Drop it in the comments below and I’ll do my best to help!
Printable Recipe
Caramel Slice Recipe (Classic Aussie Favourite)

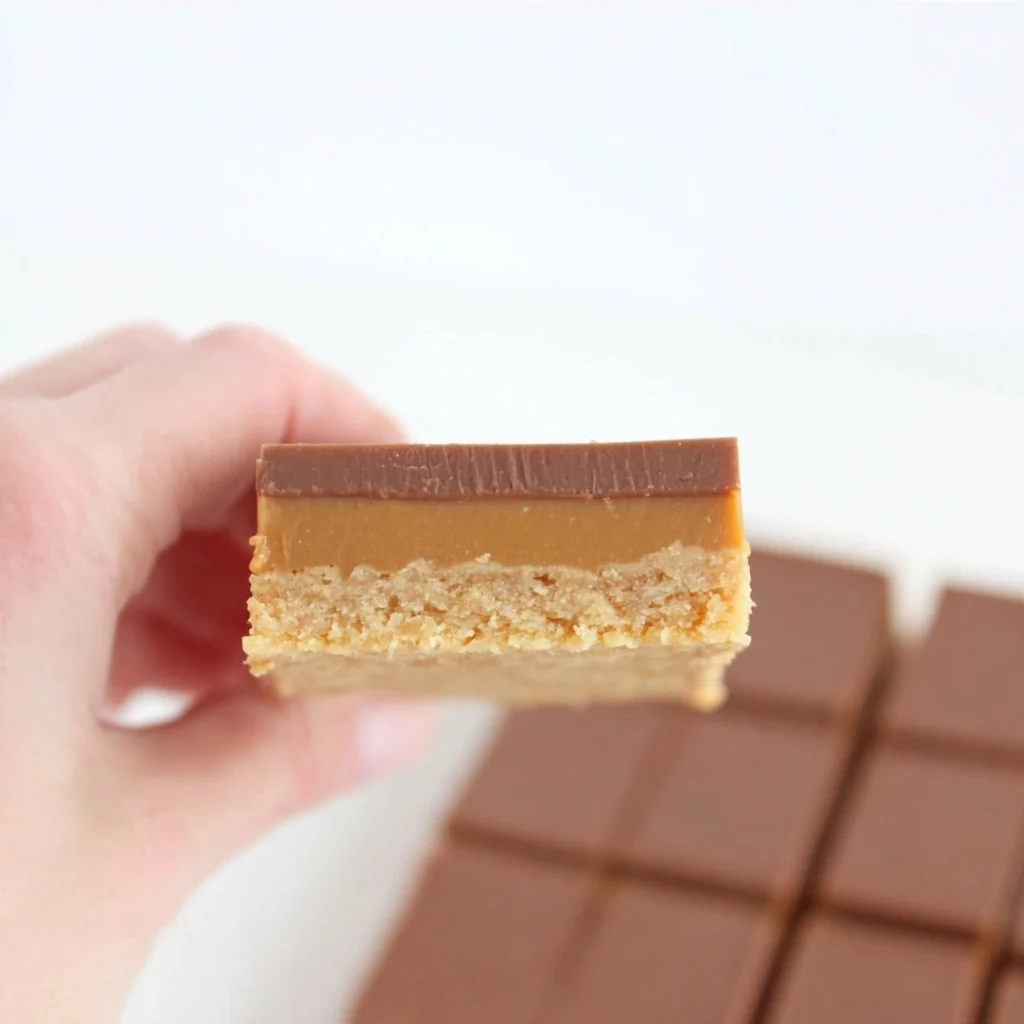
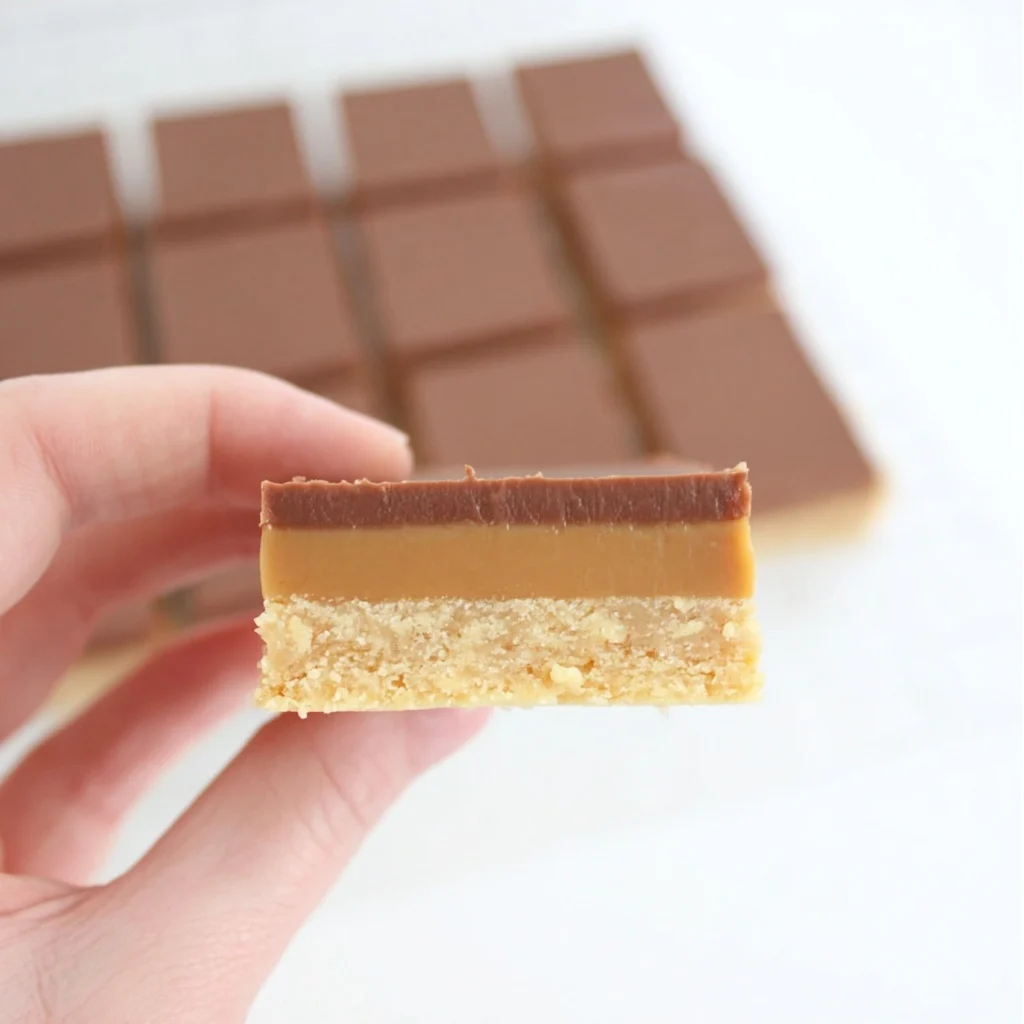
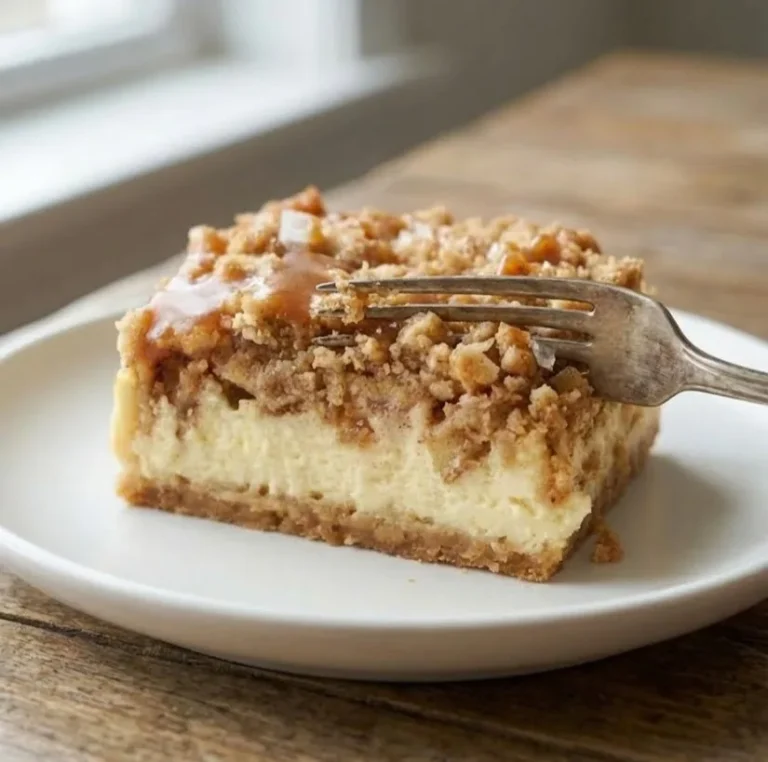
This caramel slice recipe is the perfect balance of buttery biscuit base, smooth golden caramel, and crisp chocolate topping. A beloved Aussie traybake that’s easy to make, stores well, and always impresses — with gluten-free, vegan, and salted caramel variations included!
Ingredients
- For the Base:
- 1½ cups plain sweet biscuits, crushed (Marie or Digestives)
- 125g unsalted butter, melted
For the Caramel Layer:
- 1 x 395g can sweetened condensed milk
- 60g unsalted butter
- ⅓ cup brown sugar (packed)
For the Chocolate Topping:
- 200g dark or milk chocolate, chopped
- 1 tsp neutral oil (vegetable or coconut)
Instructions
- Preheat oven to 180°C (160°C fan-forced). Line a 20x20cm slice tin with baking paper, leaving an overhang for easy removal.
- Combine crushed biscuits and melted butter. Press firmly into the tin to form an even base. Bake for 10 minutes, then set aside.
- For the caramel: In a saucepan over medium-low heat, combine condensed milk, butter, and brown sugar. Stir constantly for 8–10 minutes until thickened and golden. Pour over the base and smooth out evenly.
- Return to oven and bake for 12 minutes. Cool completely before adding chocolate.
- Melt chocolate and oil together in the microwave or over a double boiler. Pour over cooled caramel layer and spread evenly.
- Refrigerate for 1–2 hours until set. Slice using a hot, dry knife for clean edges.
Notes
- Salted Caramel: Add ½ tsp sea salt flakes to the caramel or sprinkle on top of the chocolate.
- Gluten-Free: Use certified gluten-free biscuits for the base.
- Vegan: Use dairy-free condensed milk, vegan butter, and plant-based chocolate.
- Cutting Tip: Let sit at room temperature for 10 minutes before slicing to prevent chocolate cracking.
- Store in the fridge for up to 5 days or freeze for up to 2 months.
Nutrition Information:
Yield: 16 Serving Size: 1 squareAmount Per Serving: Calories: 460Carbohydrates: 45gSugar: 35gProtein: 4g
Nutrition information is an estimate only and is based on standard ingredients and serving sizes. Actual values may vary depending on specific brands, preparation methods, and portion sizes. Always consult a qualified nutritionist or medical professional if you have dietary concerns.
Wrap-Up & Final Thoughts
If you’ve made it this far, you’re officially ready to master this caramel slice recipe — and honestly, once you’ve made it once, you’ll wonder why you ever bought it from the shops.
This slice has it all: a buttery, crunchy base, silky caramel, and that perfectly snappy chocolate topping. Whether you keep it classic, go full salted caramel, or try a vegan twist, it’s a crowd-pleaser every single time. It’s the kind of recipe you’ll keep in your back pocket — and everyone will ask for “your” version.
So next time you’re planning a sweet treat for a party, school bake sale or just because — come back to this caramel slice recipe. It’s easy, versatile, and always a hit. And if you’re building a collection of Aussie classics, this caramel slice recipe absolutely deserves a permanent spot.
If you give it a go, I’d love to hear how it turned out! Drop a comment below, tag me in your photos, or pin it for later so you always have it on hand. Because good recipes are meant to be shared 💛


I absolutely love this Caramel Slice recipe! The layers are perfectly balanced.Thanks for sharing this delicious treat!